This section describes the following aspects of managing users:
Adding Users
Prerequisite
- The user must be present in the Active Directory.
Action
To add a user to OneSpan Sign for Microsoft Dynamics CRM:
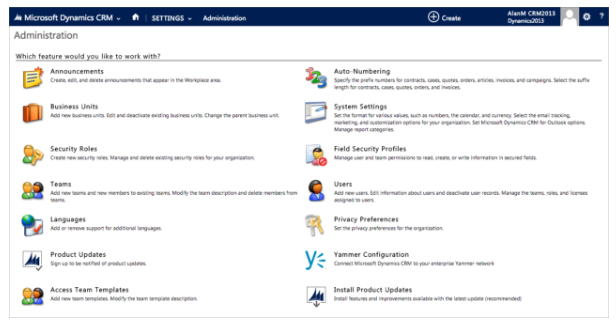
- Click the OneSpan Sign for Microsoft Dynamics CRM drop-down menu, and select Settings.
- Click Users.
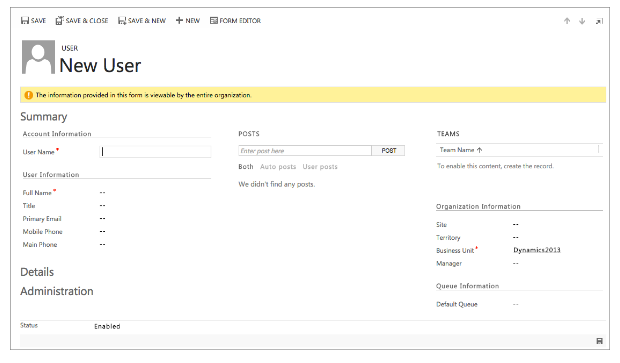
- Click New to add a new user.
- Add a new user by selecting them from the Active Directory.
- Click Save & Close.

Changing User Permissions
To change a user's permissions:
- Click the OneSpan Sign for Microsoft Dynamics CRM drop-down menu, and select Settings > Security > Users.
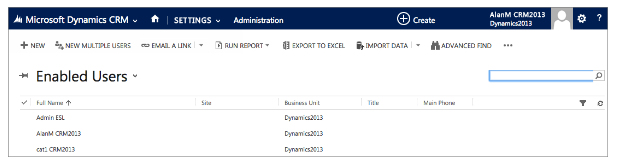
- On the list of Enabled Users, click the user whose permissions you want to modify.
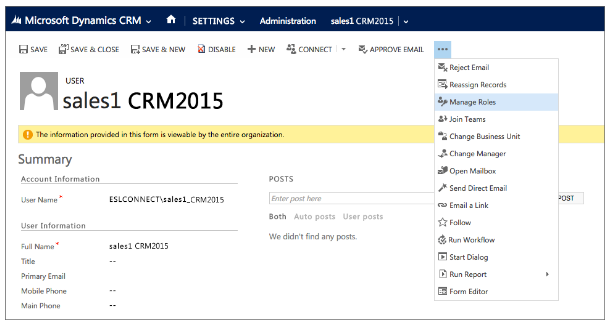
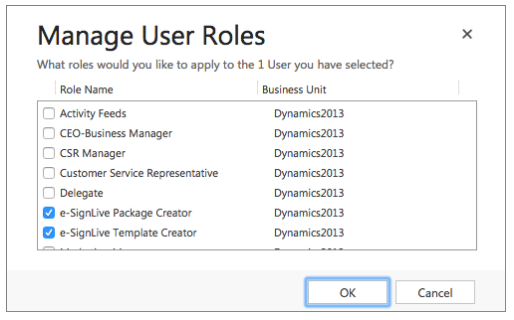
- Click the ellipse (…), then click Manage Roles.
- Check all and only the boxes next the Roles you want to give the user.
- Click OK to approve these permissions for the user.
- Click Save & Close.
This section describes the following aspects of managing users:
Adding Users
Prerequisite
- The user must be present in the Active Directory.
Action
To add a user to OneSpan Sign for Microsoft Dynamics CRM:
- Click the OneSpan Sign for Microsoft Dynamics CRM drop-down menu, and select Settings.
- Click Users.
- Click New to add a new user.
- Add a new user by selecting them from the Active Directory.
- Click Save & Close.
Changing User Permissions
To change a user's permissions:
- Click the OneSpan Sign for Microsoft Dynamics CRM drop-down menu, and select Settings > Security > Users.
- On the list of Enabled Users, click the user whose permissions you want to modify.
- Click the ellipse (…), then click Manage Roles.
- Check all and only the boxes next the Roles you want to give the user.
- Click OK to approve these permissions for the user.
- Click Save & Close.
After you have installed the solution, you should configure it by performing the following procedures:
- Configuring Microsoft Azure
- Specifying Account Information
- Specifying a Language
- Specifying User Permissions
Configuring Microsoft Azure
Prerequisites
- You must have Administrator privileges for Microsoft Azure.
- Microsoft Azure's location-based policy has been turned off. For more on that policy, see this article.
Action
To register OneSpan Sign for Microsoft Dynamics CRM with Microsoft Azure:
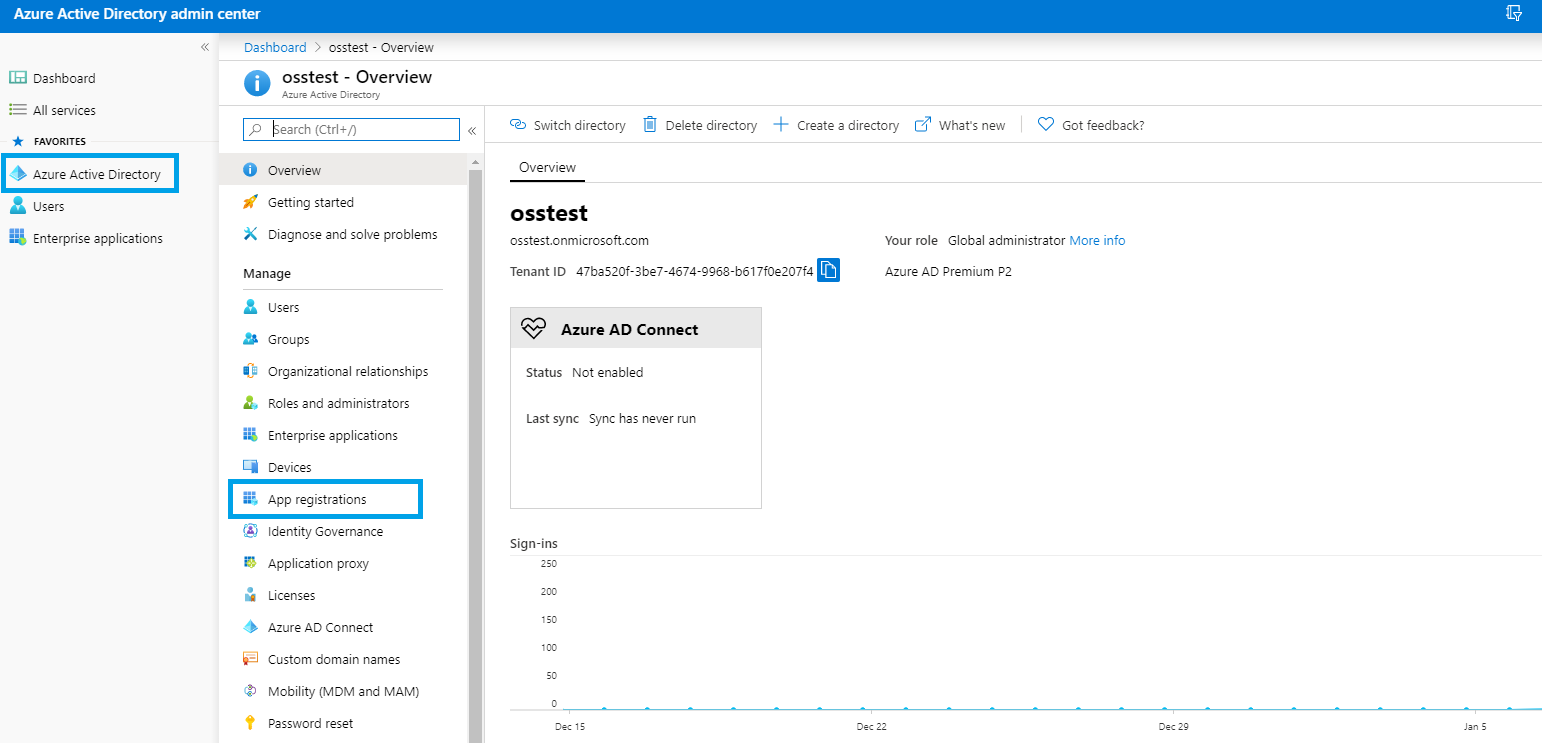
- Log into https://portal.azure.com as a user with Administrator privileges.
- From the menu, select Azure Active Directory.
- From the active menu, select App registrations.
-
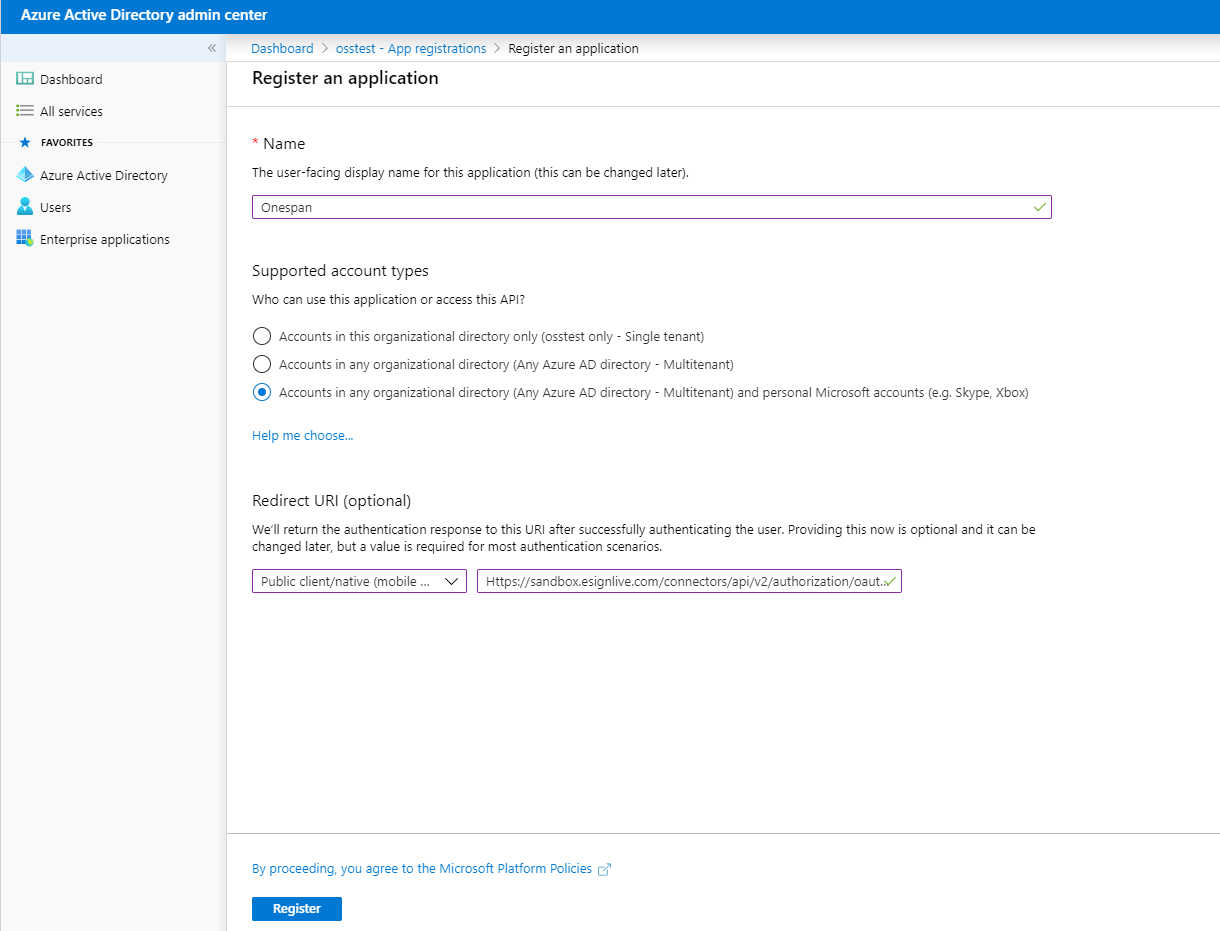
Click + New registration. The Register an application page appears.
- Type a Name for your application.
- Under Supported account types, select who can access this application.
- Specify the Redirect URL, giving it the following form:
https://<DOMAIN_NAME>/connectors/api/v2/authorization/oauth2/dynamicscrm/<ORGANIZATION_NAME>
Here:
- Replace the variable
< DOMAIN_NAME>with the string that corresponds to your environment. The last two columns of the following table provide some examples:
Sandbox Production US Customers sandbox.esignlive.com apps.esignlive.com Candadian Customers sandbox.e-signlive.ca apps.e-signlive.ca Australian Customers apps.esignlive.com.au European Customers apps.esignlive.eu - Replace the variable
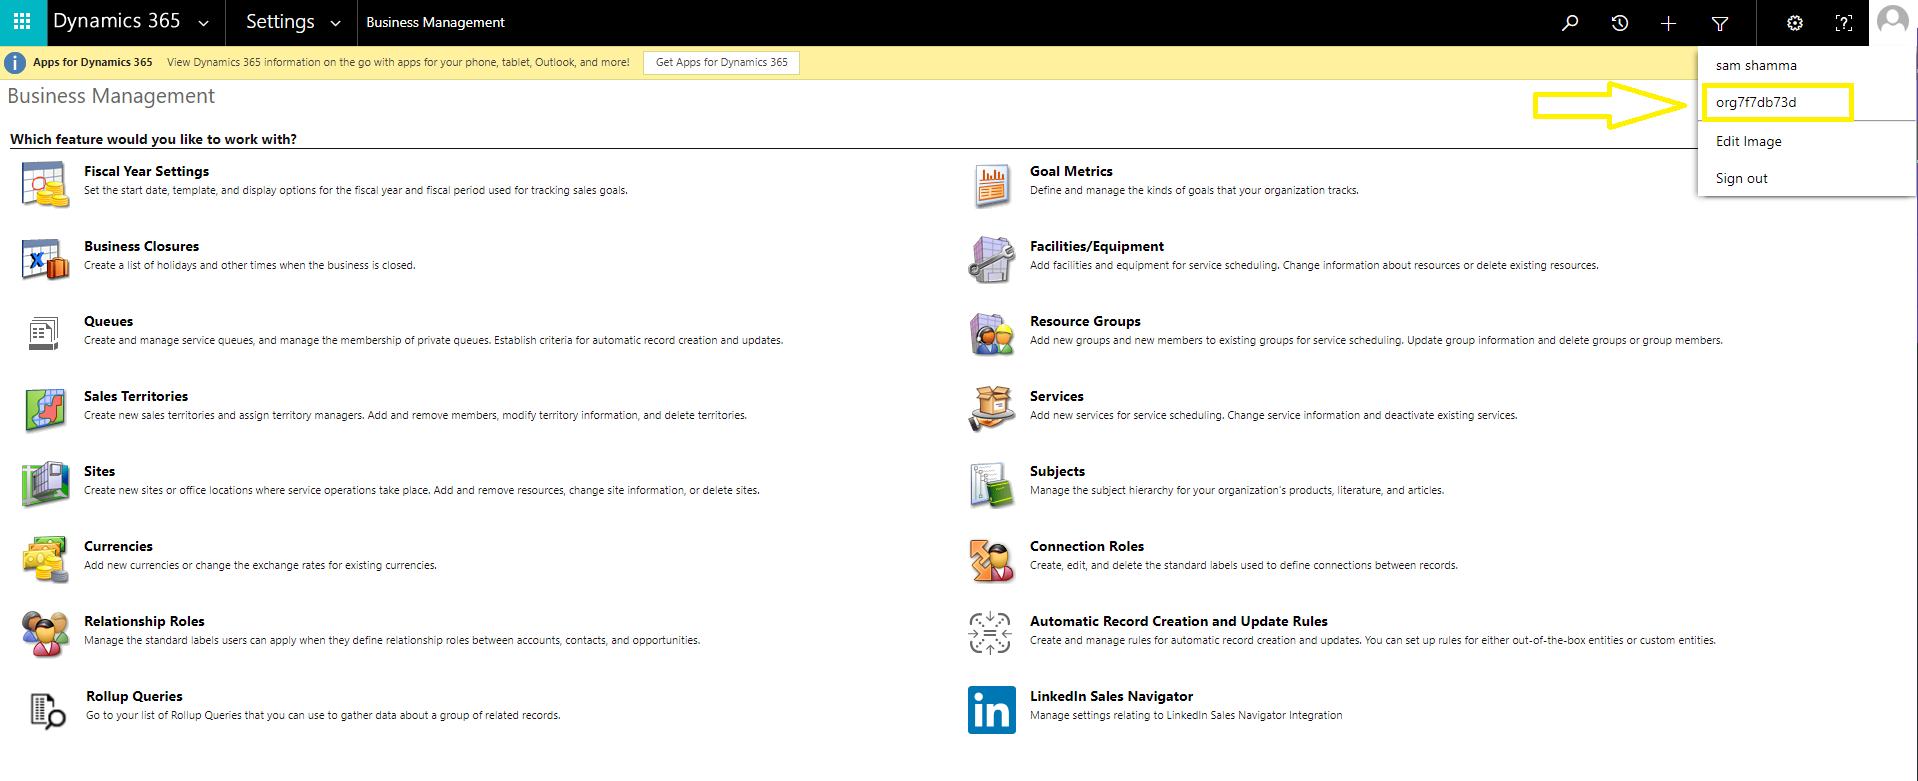
<ORGANIZATION_NAME>with the value you see in the drop-down menu under your user name (your organization name begins with "org").
The following example of a Redirect URL has no variables:
Do not use the following URL — it's only an example. You must build your own URL.
https://sandbox.esignlive.com/connectors/api/v2/authorization/oauth2/dynamicscrm/org7f7db73d
- Replace the variable
- Select Public client/native as your application type.
- Click Register.
- Copy the application ID, and keep it handy (example: e1928f91-f723-4406-94cf-024fcf9ae6b8).
- Click View API permissions. The API permissions page appears.
- Click Add a permission.
- Select Dynamics CRM.
- Under Delegated Permissions, check the user_impersonation box.
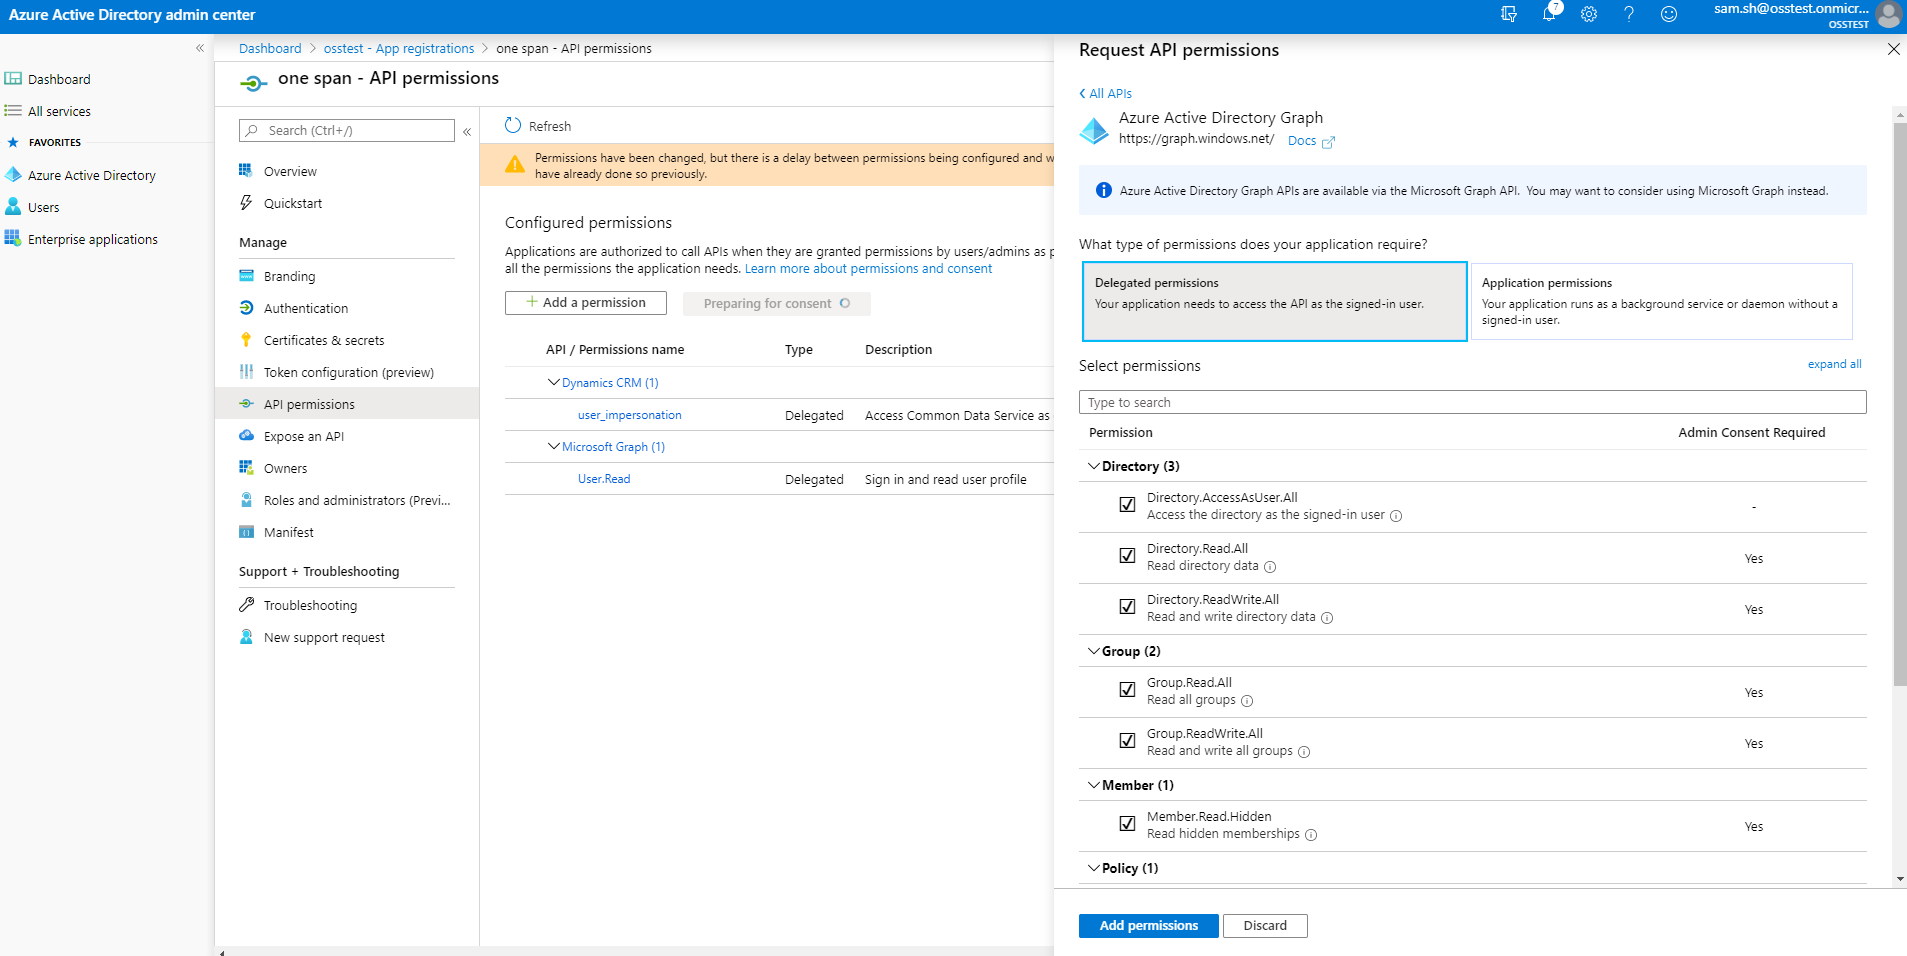
- Click Add a permission.
- Select Azure Active Directory
- Under Delegated Permissions, expand all and then check all.
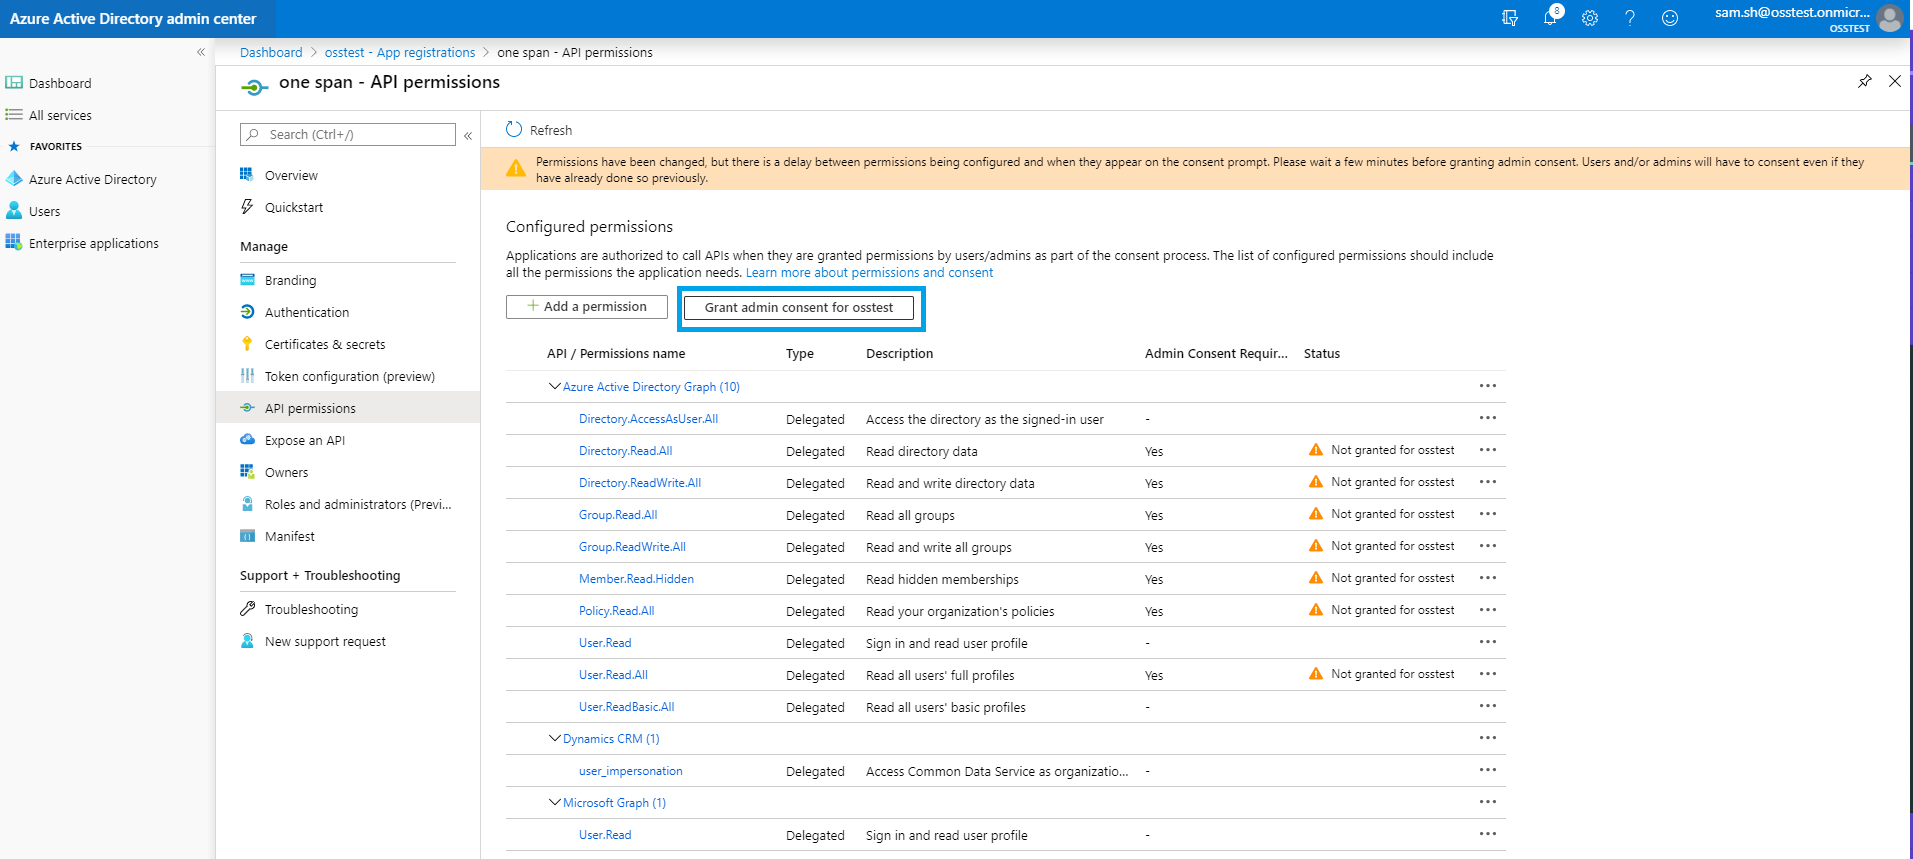
-
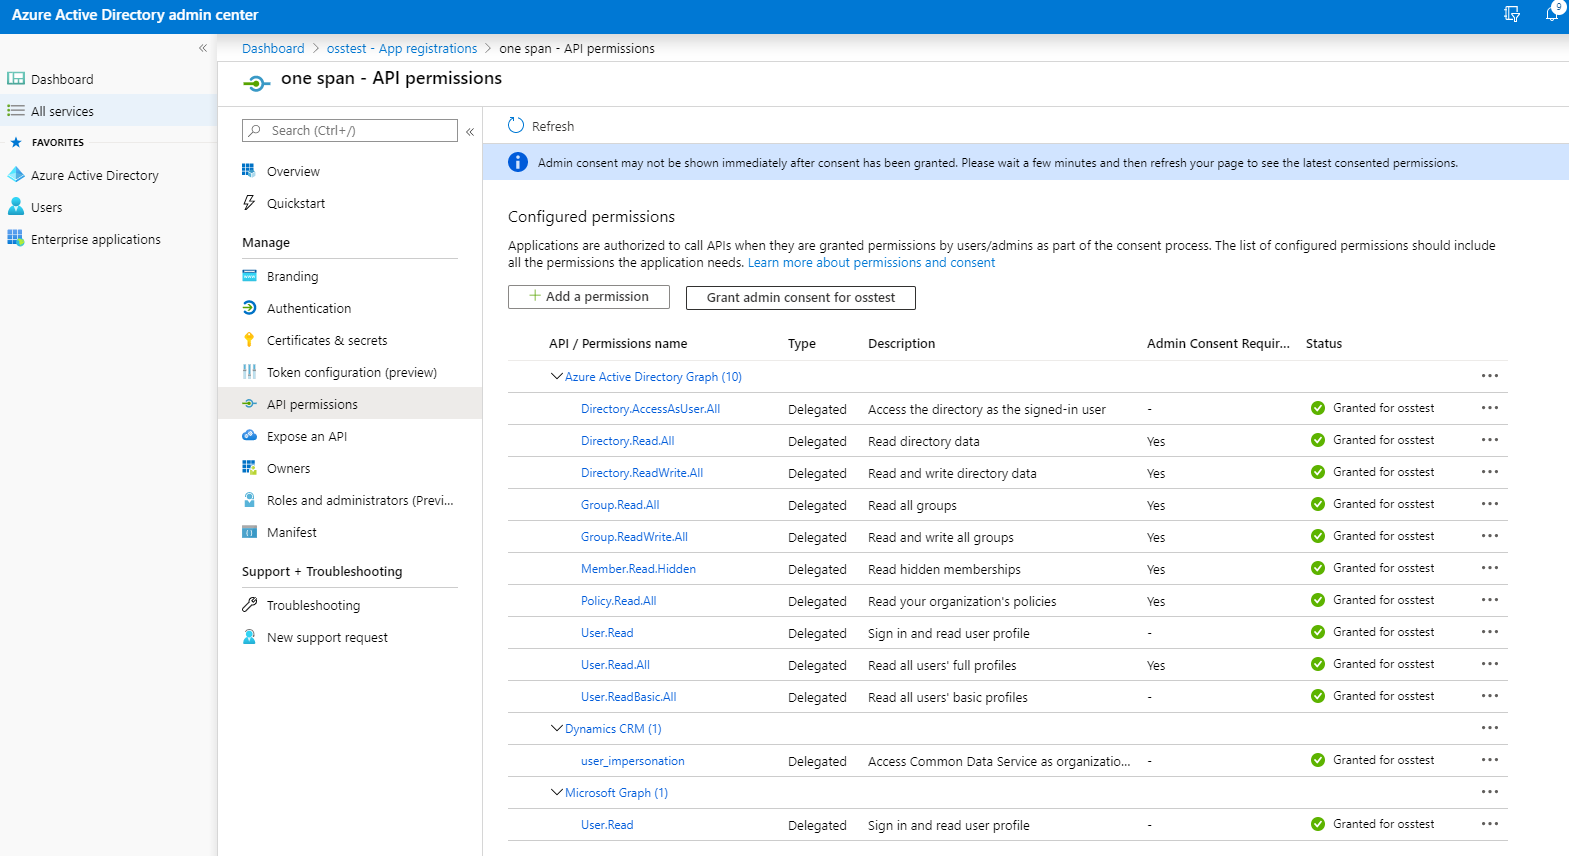
Wait until the Grant admin consent button is available, then click that button.
- Click Yes in the dialog box that appears. The page should now look like this:
Specifying Account Information
Your organization should have only one OneSpan Sign account.
To inform OneSpan Sign for Microsoft Dynamics CRM about your OneSpan Sign account:
- Log into OneSpan Sign for Microsoft Dynamics CRM. You must log in as a user who: (a) has Administrator privileges in Microsoft Dynamics CRM; (b) owns the email address of the OneSpan Sign account. Both these conditions must be met.
- Navigate to OneSpan Sign for Microsoft Dynamics CRM > OneSpan Sign > Account Settings.
- From the ribbon, click New to create a new OneSpan Sign account. A new page appears.
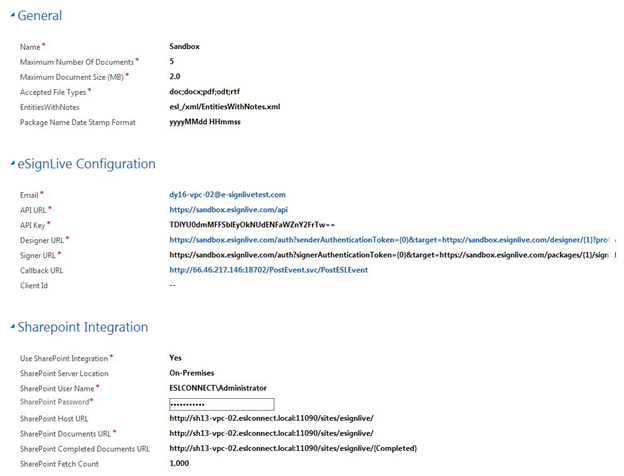
- Specify the following General parameters:
- Name: Name of the active OneSpan Sign account
- Maximum Number Of Documents: Maximum number of documents that can be included in a package (default = 10).
- Maximum Document Size: Maximum size (in MB) of a document that can be included in a package (default = 10.0). Note: In the Settings section of the OneSpan Sign for Microsoft Dynamics CRM application, you can set an upper limit to an attachment's file size. That upper limit should be larger than this Maximum Document Size.
- Accepted File Types: A comma-separated list of the types of file that can be added to a package. The default value is doc; docx; pdf; odt; rtf.
- EntitiesWithNotes: Name of the Web resource that contains: (1) the list of entities for the Document Manager; (2) the drop-down menu in the Related Entity section of the Package form.
- Package Name Date Stamp Format: Format of the date stamp appended to the package name. The supported formats can be viewed here. The default value is: yyyy-MMM-dd-H-mm-ss
- Specify the following OneSpan Sign Configuration parameters:
- Email: Email address of the account owner
- API Key: Your OneSpan Sign API key. You can obtain it from our Support Team.
As mentioned above, you must have a Sandbox account. Accordingly, specify the parameters API URL, Designer URL and Signer URL as follows:
- Callback URL: If you have an on-premises deployment, this parameter is the URL of the Push Notification Service, which receives callbacks from OneSpan Sign (for more, see the last step of the procedure Installing the Push Notification Service). If you have an online deployment, enter the following value for this parameter: https://server/PostEvent.svc/PostESLEvent
- Client ID: The identification number of the client from Configuring Microsoft Azure. This parameter is relevant only for online installations.
API URL https://sandbox.esignlive.com/api Designer URL https://sandbox.esignlive.com/auth?senderAuthenticationToken={0}&target=https://sandbox.esignlive.com/designer/{1}?profile=dynamics2.1 Signer URL https://sandbox.esignlive.com/auth?signerAuthenticationToken={0}&target=https://sandbox.esignlive.com/packages/{1}/sign?iframe=true - Indicate if you want to use SharePoint Integration. If you select Yes, specify the following parameters:
- SharePoint Server Location: Select On-Premises if the SharePoint server is available locally. Select Online if the SharePoint server is on the Cloud.
- SharePointUsername: The username employed to access SharePoint. Ensure that the user has access to the SharePoint site/library specified in the parameters SharePoint Documents URL and SharePoint Completed Documents URL below.
SharePoint Password: The password for the SharePoint Username.
- SharePoint Host URL: This parameter is reserved for the future use of SharePoint Online.
- SharePoint Documents URL: URL of the SharePoint site or library from which documents will be uploaded to OneSpan Sign for Microsoft Dynamics CRM . If this URL points to a specific SharePoint library, the system will upload documents only from that library.
- SharePoint Completed Documents URL: This feature is not supported in Version 2 of OneSpan Sign for Microsoft Dynamics CRM.
- SharePoint Fetch Count: The maximum number of documents fetched while querying a SharePoint site.
- Click Save or Save and Close.
- From the ribbon, click Verify Settings to confirm that: (a) the API Key and API URL are correct; (b) communications with the OneSpan Sign server can be established.
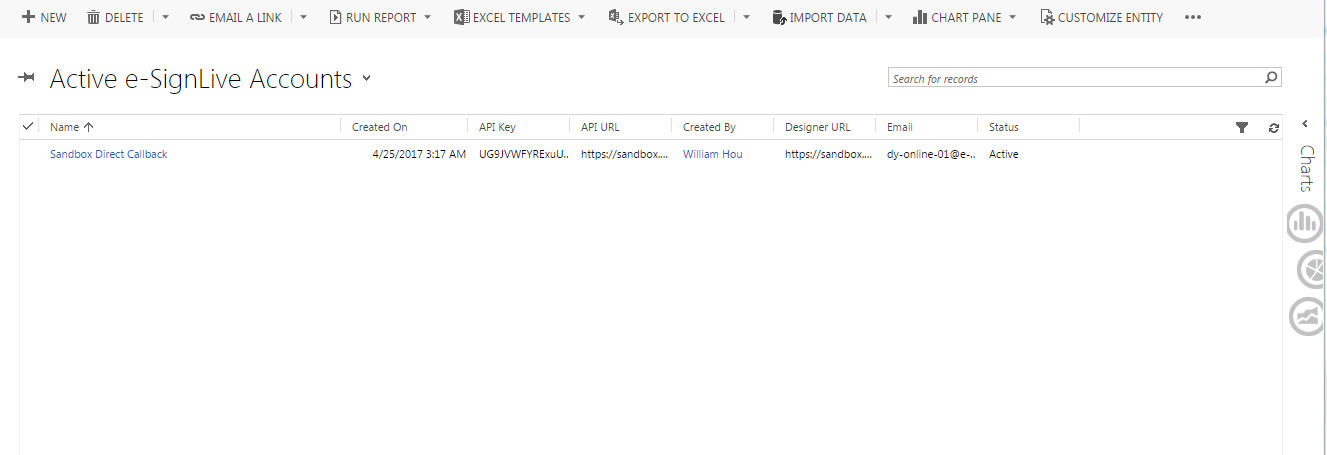
- From the ribbon, click Set Callback URL to register the URL with OneSpan Sign.
An Active OneSpan Sign Accounts list appears. Initially this list should be empty.
Specifying a Language
To specify a language for OneSpan Sign transactions:
- Log into OneSpan Sign for Microsoft Dynamics CRM as a user with Administrator privileges.
- Navigate to OneSpan Sign for Microsoft Dynamics CRM > OneSpan Sign > Language. A Languages list appears. This list should initially be empty.
- To create a new language for OneSpan Sign, click New.
- Enter the required information (e.g., Name = English, Value = en). You can view all supported languages and their associated values here. You must enter one of those values, though you can specify the name as you wish.
- Click Save.
Specifying User Permissions
To specify a user's permissions:
- Log into OneSpan Sign for Microsoft Dynamics CRM as a user with Administrator privileges.
- Click the gear icon in the upper-right corner, and select Advanced Settings > Settings > Security > Users.
- From the Enabled Users list, double-click the name of the relevant user.
- Click Manage Roles.
- Check all and only the boxes next to the Roles you want the user to have (e.g., OneSpan Package Creator, OneSpan Plugin Role, OneSpan Template Creator). Each Role is defined by a set of associated permissions.
- Click OK.