Managing Documents
This section describes the following topics, which are relevant to managing documents:
Adding Documents
OneSpan Sign supports the following document types:
- Adobe's Portable Document Format (*.pdf) — PDFs on which OneSpan Sign can act generally have at least these permissions enabled: (1) Changing the Document; (2) Signing; (3) Filling of form fields.
- Microsoft Word (*.doc or *.docx)
- Open Office (*.odt)
- Text (*.txt)
- Rich Text Format (*.rtf)
In addition, the OneSpan Sign Print Driver supports any document that can be printed from a Windows-based application (e.g., Microsoft Word, Microsoft Excel, Microsoft PowerPoint).
File Size Constraints
- The maximum size of a single document is 16 MB. Smaller documents yield better performance — we recommend under 5 MB per document.
- If your organization uses Salesforce or Microsoft SharePoint connectors, the file size maximum is 5 MB per document.
- If your organization uses Salesforce connectors, the maximum number of documents that can be added to a transaction is ten (10).
- If you enable email delivery while configuring a recipient, attachments larger than 5 MB are not supported.
File Name Constraints
- Document file names should not contain any of the following comma-separated characters: *, /, \, :, <, >, |, ?, ".
- A document's name cannot contain the string esigned.
General File Constraints
- We recommend that you do not use PDF documents that make use of XML Forms Architecture. For more information, see XFA Support.
- Do not upload password-protected or corrupted documents. These will generate an error.
- OneSpan strongly recommends that you scan a PDF for syntax errors (e.g., by using Adobe's Preflight tool), and resolve any errors before you add the document to a transaction.
- PDFs with the NeedAppearances flag set to true are not currently supported.
You must save a package before you can add a document to it.
To add a document to a package from a local repository:
- Go to the Documents section of the page for the package.
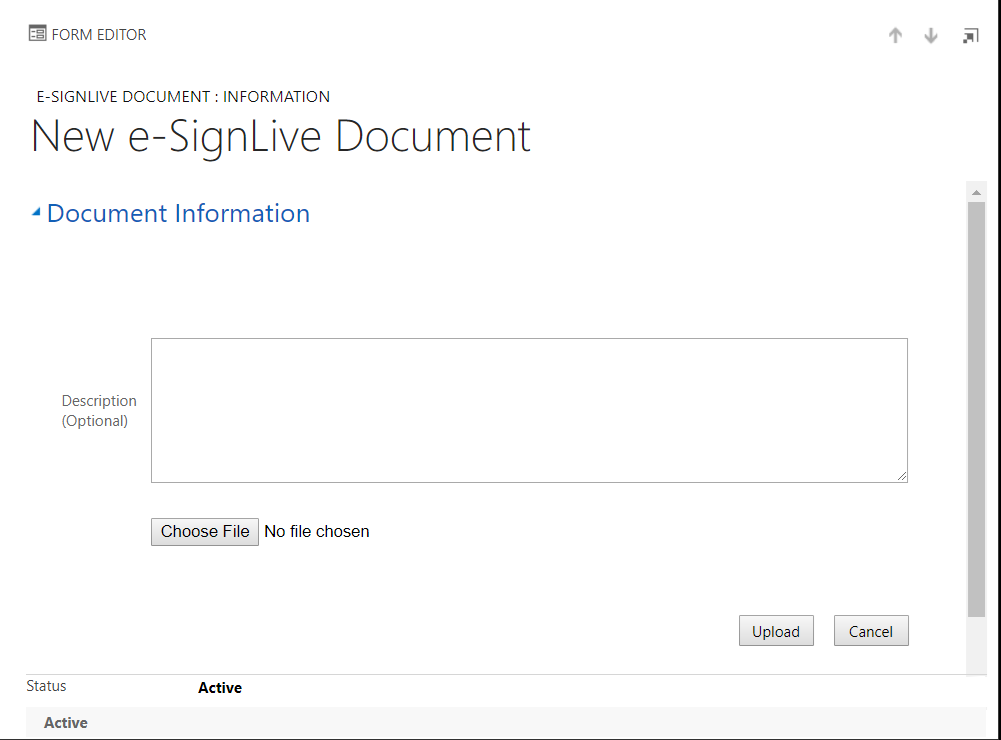
- Click the plus sign (+) near the page's right-hand side. The following page appears.
- Click Choose File, and select a document from a local repository.
- Optional: Enter a Description of the document.
- Click Upload.
Changing the Document Order
To change the order in which documents will be presented to signers:
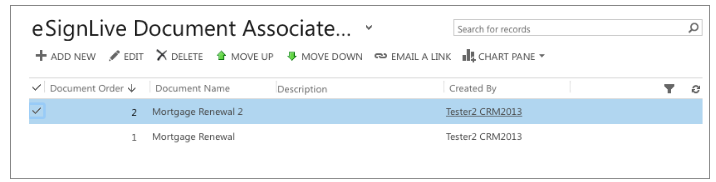
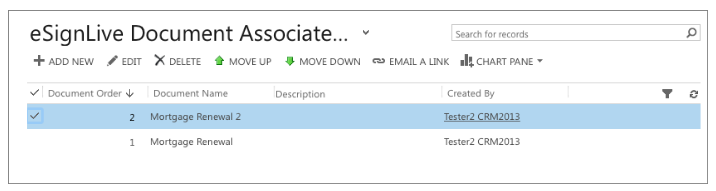
- In the Documents section, under Document Order, select the box next to a document whose position in the Documents list you want to change.
- In the ribbon, click Move Up or Move Down until the document is in the desired position.
- Repeat Steps 1 and 2 for other documents until all documents are in the desired order.
Deleting Documents
To delete a document from a package:
- Select the box next to the name of the document you want to delete.
- In the ribbon, click Delete.
- A Confirm Deletion dialog box appears. Click OK.
Managing Documents
A OneSpan Sign document package is a container for related documents that need to be signed. In general, such packages contain one or more documents (up to ten) and one or more signers. The sender of a package generally performs the following procedures:
You can add documents to a package in the following ways:
- Adding Documents from an Entity in OneSpan Sign for Microsoft Dynamics CRM
- Adding Documents from a Local Repository
- Adding Documents from SharePoint
A package must be saved before documents can be added to it.
The following procedures can also be used to manage a package's documents:
OneSpan Sign supports the following document types:
- Adobe's Portable Document Format (*.pdf) — PDFs on which OneSpan Sign can act generally have at least these permissions enabled: (1) Changing the Document; (2) Signing; (3) Filling of form fields.
- Microsoft Word (*.doc or *.docx)
- Open Office (*.odt)
- Text (*.txt)
- Rich Text Format (*.rtf)
In addition, the OneSpan Sign Print Driver supports any document that can be printed from a Windows-based application (e.g., Microsoft Word, Microsoft Excel, Microsoft PowerPoint).
The list of supported document types can be customized using the OneSpan Sign Account page.
File Size Constraints
- The maximum size of a single document is 16 MB. Smaller documents yield better performance — we recommend under 5 MB per document.
- If your organization uses Salesforce or Microsoft SharePoint connectors, the file size maximum is 5 MB per document.
- If your organization uses Salesforce connectors, the maximum number of documents that can be added to a transaction is ten (10).
- If you enable email delivery while configuring a recipient, attachments larger than 5 MB are not supported.
File Name Constraints
- Document file names should not contain any of the following comma-separated characters: *, /, \, :, <, >, |, ?, ".
- A document's name cannot contain the string esigned.
General File Constraints
- We recommend that you do not use PDF documents that make use of XML Forms Architecture. For more information, see XFA Support.
- Do not upload password-protected or corrupted documents. These will generate an error.
- OneSpan strongly recommends that you scan a PDF for syntax errors (e.g., by using Adobe's Preflight tool), and resolve any errors before you add the document to a transaction.
- PDFs with the NeedAppearances flag set to true are not currently supported.
Adding Documents from an Entity in OneSpan Sign for Microsoft Dynamics CRM
To add documents to a package from an entity in OneSpan Sign for Microsoft Dynamics CRM:
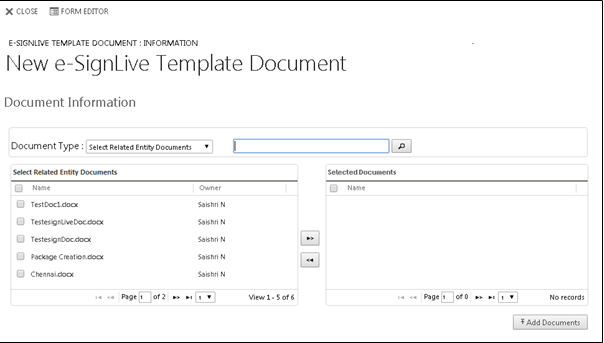
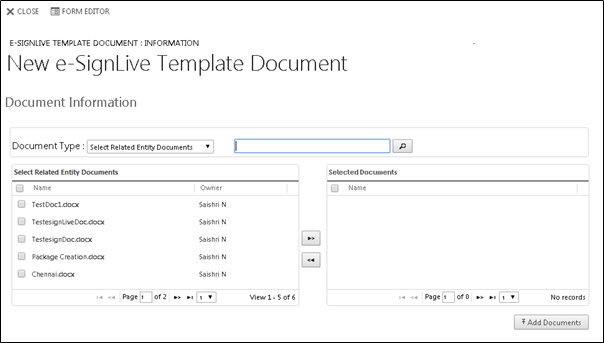
- From the Documents section of your saved package, click "+." The following dialog box appears.
- From the Document Type list, select one of the following:
- All Documents (the default) — This lists all documents in all entities in OneSpan Sign for Microsoft Dynamics CRM.
- Select Related Entity Documents — This lists all documents in CRM entities of type Related Entity of the Package. This option appears only if a related entity is available in the package.
- Other Entities Documents — This lists all documents in CRM entities of type Unrelated Entity of the Package.
- Select SharePoint Documents — This option appears in the drop-down list if in the OneSpan Sign Account SharePoint Integration is set to Yes. If that setting is No, this option won't appear.
- From the list on the left, select the boxes next to the documents you want to add. Then click the right-facing arrow to move them to the Selected Documents list on the right. For example:
- If you want to move a document out of the Selected Documents list, select its box and click the left-facing arrow.
- When you have all the documents you want in the Selected Documents list, select the boxes associated with them, and click Add Documents.
- Click OK. The selected documents are added to the package.

Optionally, you can search for documents by typing a name in the provided search field, and clicking the Search icon (a magnifying glass).
Adding Documents from a Local Repository
To add documents to a package from a local repository:
- From the Documents section of your saved package, click "+". The New OneSpan Sign Document page appears.
- From the Document Type list, select Upload Local Files.
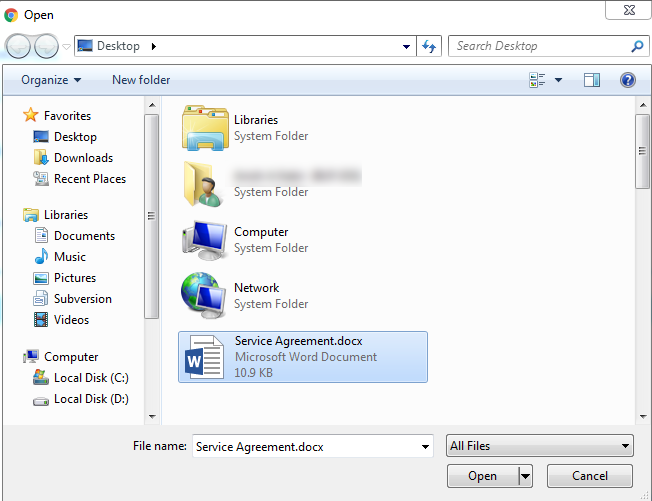
- Click Choose Files.
- Select one or more document files from a local repository, and click Open.
- Select the boxes next to the documents you want to add, and click Add Documents.
- Click OK. Your selected documents are added to the package.
Adding Documents from SharePoint
To add documents to a transaction from a Microsoft SharePoint library:
- Select the transaction.
- In the Documents section of your transaction, click Select Document. The Document Library appears.
- Select the location of the documents you want to add.
- Select the documents you want to add.
- Click OK. The selected documents are added to the transaction.
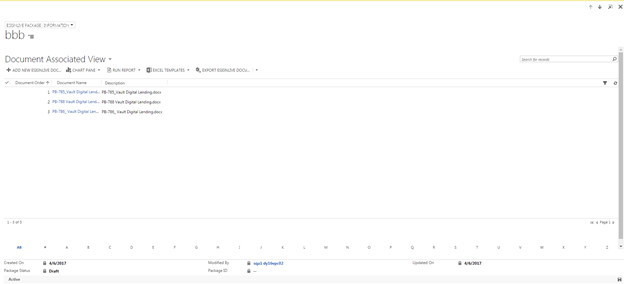
Changing the Document Order
To change the order of documents in a package:
- In the Documents section of the package, click the top rightmost icon (
 ).
). - Select a document whose order you want to change.
- From the ribbon, click Move Up or Move Down until the document is in the desired position.
- Repeat the previous two steps for each document whose order you want to change.
Deleting a Document
To remove a document from a package:
- Navigate to the Documents section of the package.
- Select the relevant document, and click Trash. A Confirm Deletion dialog box appears.
- Click OK. The document is removed from the package.