Creating & Sending a Transaction
A package is an e-signature process within OneSpan Sign. To create a package and then distribute its documents for signing, perform the following procedures:
- Step 1. Creating a Package
- Step 2. Managing Signers
- Step 3. Adding Documents
- Step 4. Preparing Documents
- Step 5. Sending a Package
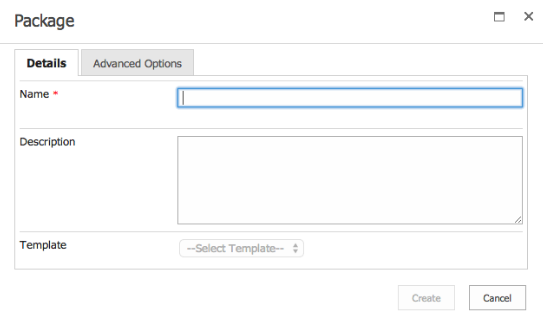
Step 1. Creating a Package
To create a package:
- On the top navigation menu, click New Package.
Optionally, you can modify an existing package by clicking Packages from the navigation menu, and selecting the package you want to modify.
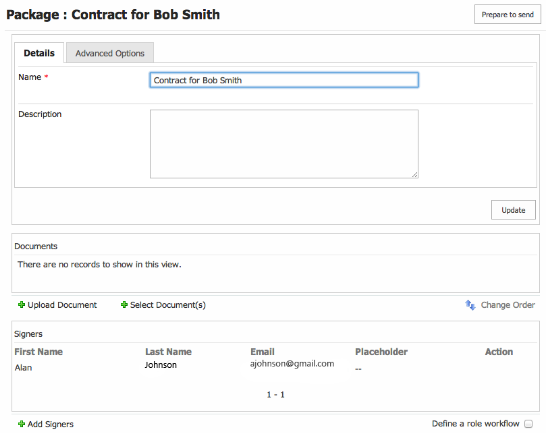
- Give the package a Name. Ensure that the name meaningfully identifies the package's contents (e.g., Mortgage Renewal Documents).
- Optional: Give the package a Description that explains its purpose.
- Optional: Select a Template from the drop-down menu if you want to base your package's creation on an existing template.
- Optional :Click Advanced Options to configure any of the following:
- Expiry Date — Indicate to all signers that the documents must be signed by a specified date.
- Language — Specify the package's language.
- Group — Specify the group to which the package belongs. If no group is selected, only the package creator will be able to take actions on the package.
- Email Message — Configure an optional email message to all signers.
- In Person Signing — Check this option if you want to require signing-in-person.
- Review After Completion — Check this option if you want to review the package and its documents before marking it as Complete.
- Click Create.

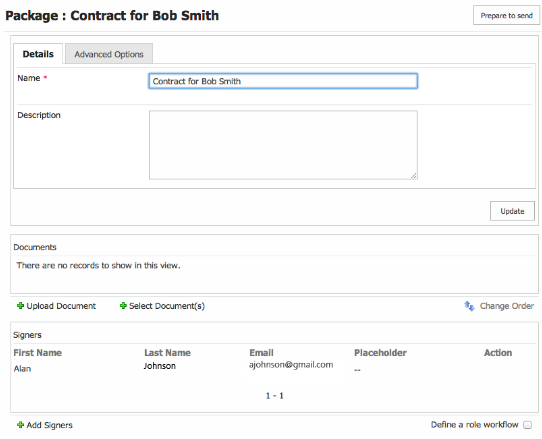
Step 2. Managing Signers
If you want someone to sign one or more documents in a package, you should add them to the package as a "signer" . Signers are added one at a time. By default, you are listed as a signer because you’re the Package Owner. All signers on the current package are displayed in the Signers list.
The rest of this section describes:
Adding Signers
To add a signer to a package:
- In the Signers section of the Package page, click Add Signers.
- Enter the signer's Email, First Name, and Last Name.
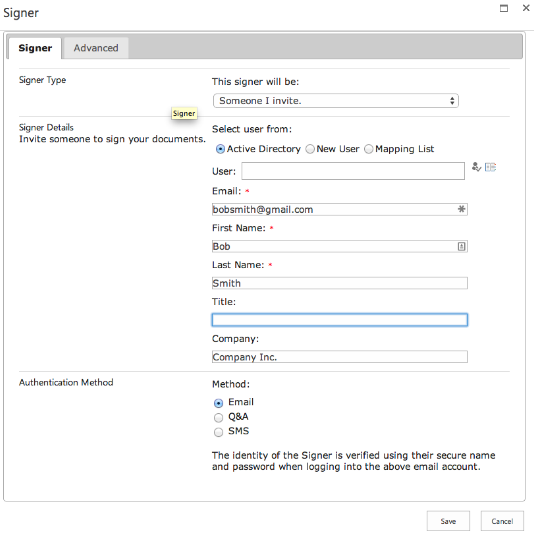
Under Signer Type, you can choose a Signer Placeholder. This is useful if you are creating a template, and don't know the signer's identity.
-
Optional: Add an existing SharePoint contact as a signer by choosing Active Directory or Mapping List. - Optional: Enter the signer's Title and Company.
- Personal Email Message Option
- Document Delivery Option
- Change Signer Option

Signer Authentication
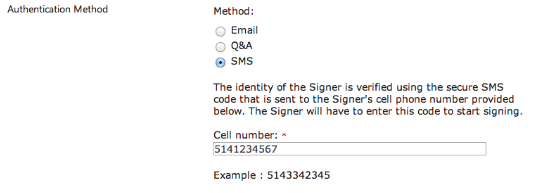
A signer can be authenticated using any of the following three methods:
- Email: This is the default Authentication Method. The identity of a signer is verified by their ability to access the email sent by OneSpan Sign. Because this method depends on the security of the email system, it is less secure than the Q&A and SMS methods.
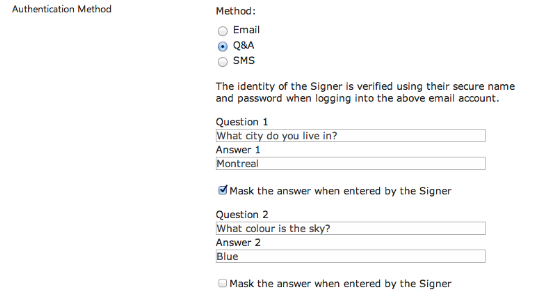
- Q&A: This method requires the Package Owner to configure one or two questions (and answers) that the signer must answer correctly. If the signer can do so, they are verified as a legitimate package recipient. If you choose to mask the answer entered by the signer, each character entered by them will appear on their screen as an asterisk (*).
- SMS: This method requires the Package Owner to provide the signer's mobile phone number. OneSpan Sign will send a code to this number once the package has been sent. The signer's identity is verified by their ability to provide this code when they try to access the package.

Changing the Signer Order
If a package has multiple documents, each signer must sign the documents in the order in which those documents appear in the Documents list.
By contrast, by default multiple signers of a package can sign in any order. If you want signers to sign in a specific order, you must configure a Signer Workflow by performing the following procedure.
To configure a Signer Workflow:
- In the Signers section, select the checkbox called Define a role workflow. The box changes its name to Change Order.
- Click Change Order. A new dialog box displays an ordered list of signers.
- Drag the handlebar to the left of each signer's name to its desired position in the Signers list. The cursor will change to a crossbar.
- When you've positioned all signers in the desired order, click OK.
Deleting Signers
To delete a signer from a package:
- Click X next to the signer's name.
Step 3. Adding Documents
This section describes:
- Uploading Documents
- Adding Documents from SharePoint Libraries
- Changing the Document Order
- Deleting Documents
OneSpan Sign supports the following document types:
- Adobe's Portable Document Format (*.pdf) — PDFs on which OneSpan Sign can act generally have at least these permissions enabled: (1) Changing the Document; (2) Signing; (3) Filling of form fields.
- Microsoft Word (*.doc or *.docx)
- Open Office (*.odt)
- Text (*.txt)
- Rich Text Format (*.rtf)
In addition, the OneSpan Sign Print Driver supports any document that can be printed from a Windows-based application (e.g., Microsoft Word, Microsoft Excel, Microsoft PowerPoint).
File Size Constraints
- The maximum size of a single document is 16 MB. Smaller documents yield better performance — we recommend under 5 MB per document.
- If your organization uses Salesforce or Microsoft SharePoint connectors, the file size maximum is 5 MB per document.
- If your organization uses Salesforce connectors, the maximum number of documents that can be added to a transaction is ten (10).
- If you enable email delivery while configuring a recipient, attachments larger than 5 MB are not supported.
File Name Constraints
- Document file names should not contain any of the following comma-separated characters: *, /, \, :, <, >, |, ?, ".
- A document's name cannot contain the string esigned.
General File Constraints
- We recommend that you do not use PDF documents that make use of XML Forms Architecture. For more information, see XFA Support.
- Do not upload password-protected or corrupted documents. These will generate an error.
- OneSpan strongly recommends that you scan a PDF for syntax errors (e.g., by using Adobe's Preflight tool), and resolve any errors before you add the document to a transaction.
- PDFs with the NeedAppearances flag set to true are not currently supported.
Uploading Documents
To upload a document to a package from a local repository:
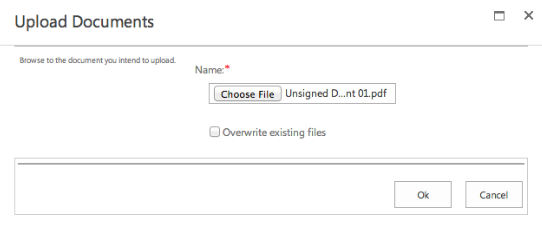
- In the Documents section of the Package page, click Upload Document.
- On the dialog box that appears, click Choose File, browse to your document's location, and select it. Click Open.
-
Optional: If you want to add another document, repeat Steps 1-2.
- Click OK.
Adding Documents from SharePoint Libraries
To add documents to a package from a SharePoint Library:
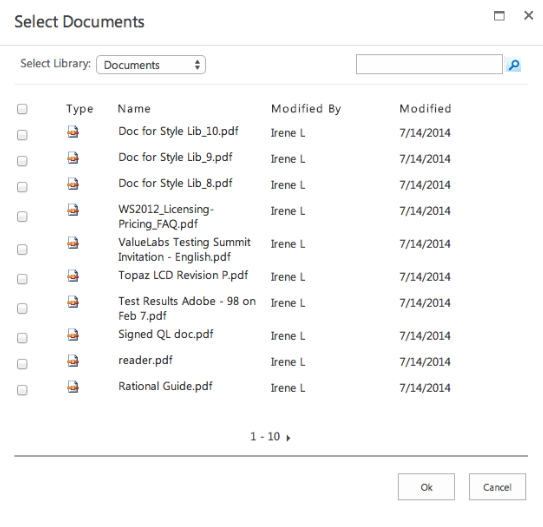
- From the Package page, click Select Document(s).
- Click the Select Library drop-down menu, and select the relevant library.
- Choose each document you want to add by selecting the box next to its name. You can select multiple files.
- Click OK.
Changing the Document Order
To change the order in which documents will be presented to signers:
- Click Change Order.
- Drag the handlebar left of each document's name to its desired location in the Documents list.
- When all documents are in the desired order, click OK.
Deleting Documents
To delete a document from a package:
- Next to the document name, under Action, click X.
Step 4. Preparing Documents
Once you have added all signers and documents to a package, you are ready to start adding Signature Boxes and fields to each document. Signature Boxes define where each signer must sign a document, and fields contain associated information about the signer. On a given document, you can include more than one Signature Box for the same signer.
The rest of this section describes:
Adding Signature Boxes and Fields
To add Signature Boxes and fields to a document:
- Open the Designer view by clicking Prepare to Send.
- On the Electronic Disclosures & Signatures Consent page, click the right arrow to view your first document.
- Using the drop-down arrow in the Signers list, select the signer whose signature you want to add.
- Click Add Signature.
- Drag the Signature Box to where you want it to appear in the document.
- To change the Signature Box type, or to add a field, click the gear icon. This will open the Signature Box menu.
- Repeat Steps 3 to 6 for each Signature Box you want to add.
- If the package has multiple documents, click the right arrow to proceed to the next document. Then repeat Steps 3 to 7.
The next section describes the types of fields that can be added.
Field Types
You can add any of the following types of fields:
- Signing Date: This field is automatically filled with the date when the document is signed.
- Signer Name: This field is automatically filled with the signer's first and last names, which are provided when the signer is added to the transaction.
- Signer Title: This field displays the signer's title, which is provided when the signer is added to the transaction. If the signer's title is not provided, this field remains blank, and is not visible on the document.
- Signer Company: This field displays the signer's company, which is provided when the signer is added to the transaction. If the signer's company is not provided, this field remains blank, and is not visible on the document.
- Text Field: This field provides a box in which the signer can enter additional information at the time of signing.
- Checkbox: A checkbox is an option that the signer can click to display a check mark (clicking again removes the mark). A checkbox is useful to indicate that the signer has completed an action. For example, a document may include the question Have you applied for a mortgage with another financial institution?, with accompanying answers Yes or No. You can place one checkbox beside Yes, and another beside No.
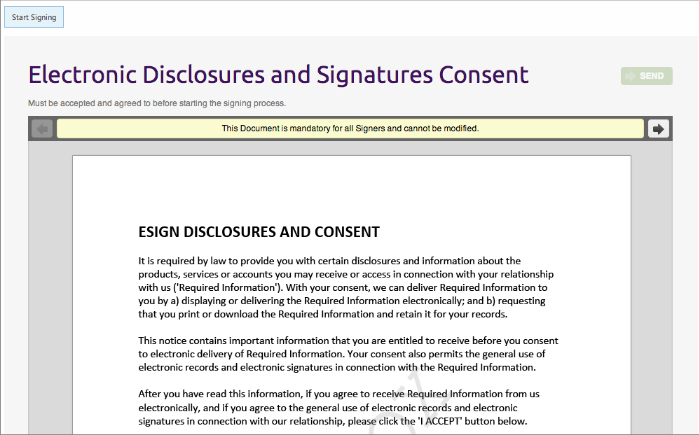
Electronic Disclosures & Signatures Consent
OneSpan Sign automatically includes the Electronic Disclosures and Signatures Consent agreement in all its transactions. All signers must accept the terms of this agreement before they can access transaction documents.
Currently, OneSpan Sign provides Electronic Disclosures and Signatures Consent agreements in English and French. If you would like to provide an Electronic Disclosures and Signatures Consent agreement in different language, or if you do not want this agreement in your transactions, please contact our Support Team.
Step 5. Sending a Package
After you have prepared a package's documents, you are ready to distribute the package to its recipients.
To send a package to its recipients:
- In the Designer, click Send.
- Click OK to confirm that you want to send the package.