To download the full code sample see our Code Share site.
This topic will walk you through the process to check the status of a transaction and to download any documents using the OneSpan Sign Java SDK.
This topic is a continuation of the steps completed in Creating and Sending a Package. At this point, you can confirm that your document package (transaction) was created and sent properly. To do this, simply check the OneSpan Sign Transactions page.
Prerequisites
To continue you need to create a new Java file. You can place this file in the same location as when you created a package, or you can start a new project. If you need help with this setup see how to create and configure a Java project.
How to Locate the Package ID of your Existing Project
Since the package you are working with has already been created, you will need to find it to use in this project. If you select the project from the Transaction page, as shown above, the URL will have the package ID, like this:
https://sandbox.esignlive.com/a/transaction/{packageId}
In the Java class you created before, you will see you had access to this package ID while creating and sending it. If you were creating a more complex application, you would likely store this package ID for use within other parts of your application, instead of using the Transaction page to look it up.
If you want to see this package ID coming from the Java class made in the previous guide, add the following line:
System.out.println(PackageId: + packageId);
After the line:
PackageId packageId = eslClient.createPackage( documentPackage );
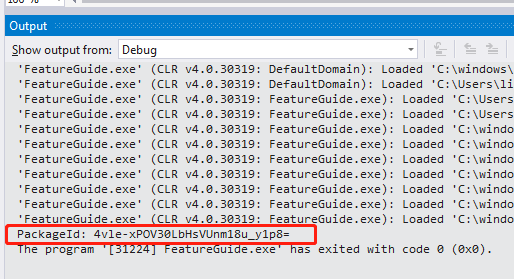
If you run that class again, you will now see the package ID printed to the console view within Eclipse.
The Code
In this segment, the code will be broken down section by section. You can get the complete sample code from our Code Share site.
Connection Information
The first few lines define your connection information OneSpan Sign.
public static final String API_KEY = "";
public static final String API_URL = "https://sandbox.esignlive.com/api";
// USE https://apps.esignlive.com/api FOR PRODUCTION
Be sure to enter your API_KEY in the placeholder location.
Again, because this is a very simple example, the rest is done within the main method. The first line inside the main method is where you connect to OneSpan Sign using your connection information, from above.
//connect to OneSpan Sign
EslClient eslClient = new EslClient( API_KEY, API_URL );
Next, a PackageId object is created using the Package ID you retrieved from your URL (or package creation Java class), above. Then, you will use that PackageId object to grab your previously sent package from the OneSpan Sign client.
//create a packageId using you packageId string
PackageId packageId = new PackageId("");
//get your package
DocumentPackage sentPackage = eslClient.getPackage(packageId);
Checking Status
Now that you have access to the document package, you can check your package to see what the package status is. The possible values are ARCHIVED, COMPLETED, DECLINED, DRAFT, EXPIRED, OPTED_OUT, and SENT. Print the status so you can see it in the console when you execute your class.
//checking package status
PackageStatus status = sentPackage.getStatus();
System.out.println(status);
Next, check the signing status of the package. The possible values for this one are ARCHIVED, CANCELED, COMPLETE, DECLINED, EXPIRED, INACTIVE, OPTED_OUT, COMPLETED, and SIGNING_PENDING. Print this status to the console, as well.
//checking signing status
SigningStatus sentSigningStatus = eslClient.getSigningStatus( packageId, null, null );
System.out.println(sentSigningStatus.getToken());
Download the Files
For the last part, you will check to see if the package is complete. If it is, the zip file of all documents will be downloaded, as well as the evidence summary. By putting just a file name for each file in the Files.saveTo lines, the file will be saved to the root of your Java project in Eclipse. After each step, print to the console so that you know the event happened when you test the Java class in the next step.
if(!sentSigningStatus.getToken().equals("COMPLETED")){ //if signing is complete, download all documents

	System.out.println("Cannot Download: Signing not complete");

} else { //download zip file

 	byte[] documentZip = eslClient.downloadZippedDocuments(packageId);
 	Files.saveTo(documentZip, "documentZip.zip");
 	System.out.println("Document Zip File Downloaded");

 	//download evidence summary
 	byte[] evidenceSummary = eslClient.downloadEvidenceSummary(packageId);
   	Files.saveTo(evidenceSummary, "evidenceSummary.pdf");
   	System.out.println("Evidence Summary Downloaded");
}
Results
You can now execute your Java class. Run the class from the toolbar, menu bar, or by right clicking on the class in the Package Explorer and going to Run As > Java Application.
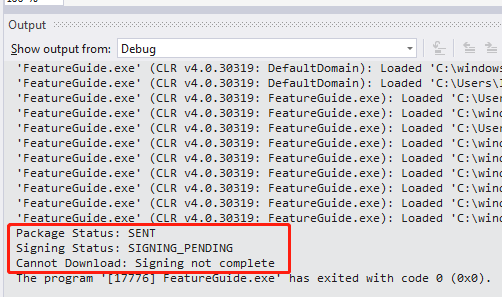
If you have not yet signed your package, your Console should look like the following:
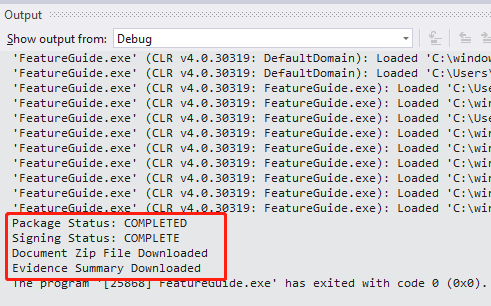
After signing your package, you will get the following output in your Console view:
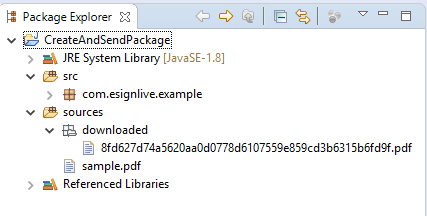
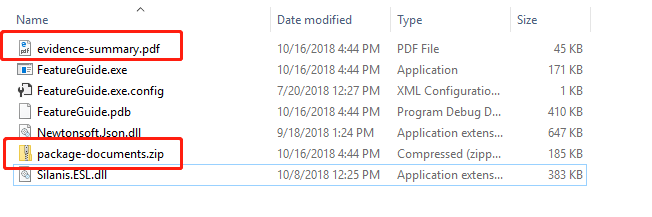
If you refresh your project in your Package Explorer by right-clicking and going to Refresh, you will see that your files were successfully downloaded.
To download the full code sample see our Code Share site.
This topic will walk you through the process to check the status of a transaction and to download any documents using the OneSpan Sign .NET SDK.
This topic is a continuation of the steps completed in Creating and Sending a Package. At this point, you can confirm that your document package (transaction) was created and sent properly. To do this, simply check the OneSpan Sign Transactions page.
Prerequisites
To continue you need to create a new project and .cs file for this guide. For example, CheckStatusAndDownload.cs. If you need help with this setup see how to create and configure a .NET project.
Locating the Package ID of your Existing Project
Since the package you are working with has already been created, you will need to find it to use in this project. If you select the project from the Transaction page, as shown above, the URL will have the package ID, like this:
https://sandbox.esignlive.com/a/transaction/{packageId}
In the C# class you created before, you will see you had access to this package ID when you created and sent it. If you were creating a more complex application, you would likely store this package ID for use within other parts of your application, instead of using the Transaction page to look it up.
If you want to see this package ID coming from the C# class made in the previous guide, you could add the line:
Debug.WriteLine(PackageId: + packageId);
After the line:
PackageId packageId = ossClient.createPackage( superDuperPackage);
If you run that class again, you will now see the package ID printed to the output window in Visual Studio.
The Code
This segment will breakdown the code section by section. You can download the full sample code from our Code Share site.
Connection Information
The first few lines define your connection information for OneSpan Sign.
private static String API_URL = "https://sandbox.esignlive.com/api";    // Use https://apps.esignlive.com/api For Production
private static String API_KEY = "YOUR_API_KEY";

//Alternatively
private static String CLIENT_APP_ID = "your_client_id";
private static String CLIENT_APP_SECRET = "your_client_secret";
private static String BASE_API_URL = "https://sandbox.esignlive.com";    // Use https://apps.esignlive.com For Production
private static String API_URL = BASE_API_URL + "/api";
Be sure to enter your API_KEY or Client App information in the placeholder location.
The first step is to connect to OneSpan Sign using your connection information, from above.
OssClient ossClient = new OssClient(API_KEY, API_URL);

//Alternatively
OssClient ossClient = new OssClient(new ApiTokenConfig {
	ClientAppId = CLIENT_APP_ID,
	ClientAppSecret = CLIENT_APP_SECRET,
	BaseUrl = BASE_API_URL,
	TokenType = ApiTokenType.OWNER
},
BASE_API_URL + "/api", false, null, new Dictionary<string, string>());
Next, a PackageId object is created using the Package ID you got from your URL (or package creation C# class), above. Then, you will use that PackageId object to grab your previously sent package from the OneSpan Sign client.
PackageId packageId = new PackageId("YOUR_PACKAGE_ID");
DocumentPackage sentPackage = ossClient.GetPackage(packageId);
Checking the Status
Now that you have access to the document package, you can check your package to see what its status is. Possible values include ARCHIVED, COMPLETED, DECLINED, DRAFT, EXPIRED, OPTED_OUT, and SENT. Print the status to the Debug output window.
DocumentPackageStatus packageStatus = sentPackage.Status;
Debug.WriteLine("Package Status: " + packageStatus);
Next, check the signing status of the package. The possible values for this one are ARCHIVED, CANCELED, COMPLETE, DECLINED, EXPIRED, INACTIVE, OPTED_OUT, COMPLETED, and SIGNING_PENDING. Print this to the Debug output window, as well.
SigningStatus signingStatus = ossClient.GetSigningStatus(packageId,null,null);
Debug.WriteLine("Signing Status: " + signingStatus);
Download the Files
Now you can check to see if the package is complete. If it is, a zip file with all documents will be downloaded, as well as an evidence summary. After each step, write to the Debug output so that you know the event happened when you test the class in the next step.
if (signingStatus.ToString().Equals("SIGNING_PENDING"))
{
   Debug.WriteLine("Cannot Download: Signing not complete");
}
else
{
   byte[] zipContent = ossClient.DownloadZippedDocuments(packageId);
   File.WriteAllBytes(Directory.GetCurrentDirectory()
                   	+ "/package-documents.zip", zipContent);
   Debug.WriteLine("Document Zip File Downloaded");

   byte[] evidenceContent = ossClient.DownloadEvidenceSummary(packageId);
   File.WriteAllBytes(Directory.GetCurrentDirectory()
                   	+ "/evidence-summary.pdf", evidenceContent);
   Debug.WriteLine("Evidence Summary Downloaded");
}
Results
Execute your C# class by clicking the Start button from the toolbar.
If you have not yet signed your package, your Output should look like the following:
After signing your package, you will get the following in your Output window:
If you now browse to the location where you saved your files you will see that your files were successfully downloaded. If you used the code above and are in Debug mode, they’ll be in the Debug folder inside your project, in your file system.
To download the full code sample see our Code Share site.
This topic will walk you through the process to check the status of a transaction and to download any documents using the OneSpan Sign Java SDK.
This topic is a continuation of the steps completed in Creating and Sending a Package. At this point, you can confirm that your document package (transaction) was created and sent properly. To do this, simply check the OneSpan SignTransactions page.
Prerequisites
To continue you need to create a new Java file. You can place this file in the same location as when you created a package, or you can start a new project. If you need help with this setup see how to create and configure a Java project. For example, create a project called CheckStatusAndDownloadRest.java.
Additionally, working with REST API requires the use of JSON. As such, an external library org.json is used. This jar file can be found here. If you require help on how to import external libraries, follow the steps in this guide.
Locating the Package ID of your Existing Project
For this example, you will need a packageId from a previously created document package. The two most likely methods to retrieve your packageId are to navigate to the package in the UI and retrieve it from the URL, or by checking the packageId returned in the HTTP response you received from your REST call.
The REST API
In this topic the following API functions will be called:
- A call to retrieve the whole package JSON, and obtain the package status.
- A call to obtain the Signing Status for the whole package, or a specific signer of specific document.
- A REST API call to download the zipped documents zip and evidence summary.
Retrieve the Package JSON
HTTP Request
GET /api/packages/{packageId} HTTP Headers
Accept: application/json; esl-api-version=11.21 Authorization: Basic api_keyFor a complete description for each field in response, you can refer to last guidance.
And refer to Release Note 10.6.1 for reason carrying "esl-api-version" in the request header.
Retrieve the Signing Status
HTTP Request
GET /api/packages/{packageId}/signingStatus?signer={signerId}&document={documentId} HTTP Headers
Accept: application/json Authorization: Basic api_keyResponse Payload
{
    "status": "COMPLETED"
}
- "signerId" in this API call can be replaced by signer's email.
Possible statuses are: ARCHIVED/ CANCELED/ COMPLETE/ DECLINED/ EXPIRED/ INACTIVE/ OPTED_OUT/ COMPLETED/ SIGNING_PENDING.
Download Zipped Documents
HTTP Request
GET /api/packages/{packageId}/documents/zip HTTP Headers
Accept: application/zip Authorization: Basic api_keyDownload Evidence Summary
HTTP Request
GET /api/packages/{packageId}/evidence/summary HTTP Headers
Accept: application/pdf Authorization: Basic api_keyThe Code
This segment of the guide only shows snippets of code. You can download the full sample code from our Code Share site.
The first two lines is where your connection info for your OneSpan Sign connection is defined. If you are on a Production environment, change the url to https://apps.e-signlive.com/api. Make sure to replace the placeholder text with your API_KEY. In the Sandbox, your API_KEY can be found in the ACCOUNT page when you sign into your OneSpan Sign account. If in production, you will need to get this from support.
String API_KEY = "YOUR_API_KEY";
String url = "https://sandbox.e-signlive.com/api/packages";
The next few lines is where you create your connection to make your GET request and set the appropriate header content-type, authorization, and accept values.
URL client = new URL(url + "/1edd9f11-9bcc-4587-94e8-aa6478bbda4d/");
HttpURLConnection conn = (HttpURLConnection) client.openConnection();
conn.setRequestProperty("Content-Type", "application/json");
conn.setRequestProperty("Authorization", "Basic " + API_KEY);
conn.setRequestProperty("Accept", "application/json");
Check the Status
Now that you have access to the document package, you can check your package to see what the package status is. In this section, you will need your package id from earlier. With it, you are ready to make your GET request to determine the status of your package. The two lines below will retrieve the status code from the HTTP response message. If the request is successful, the responseCode should print out 200.
int responseCode = ((HttpURLConnection) conn).getResponseCode();
If the request is successful, you can create an input stream and read from the connection in a BufferedReader. The JSON content of the response is subsequently parsed into a JSONObject and printed out. The status of the package is given in the status property of the JSONObject.
System.out.println(responseCode + " OK!");
BufferedReader in = new BufferedReader(new InputStreamReader(conn.getInputStream()));
String inputLine;
StringBuffer response = new StringBuffer();

while ((inputLine = in.readLine()) != null) {
   response.append(inputLine);
}

in.close();

JSONObject json = new JSONObject(response.toString());
System.out.println(json.getString("status"));
Retrieving the signing status of your package is done exactly the same way except for an addition of /signingStatus to the request url.
URL client2 = new URL(url + "/1edd9f11-9bcc-4587-94e8-aa6478bbda4d/signingStatus");
HttpURLConnection conn2 = (HttpURLConnection) client2.openConnection();
conn2.setRequestProperty("Content-Type", "application/json");
conn2.setRequestProperty("Authorization", "Basic " + API_KEY);
conn2.setRequestProperty("Accept", "application/json");

int responseCode2 = ((HttpURLConnection) conn2).getResponseCode();

if (responseCode2 == 200) {
   System.out.println(responseCode2 + " OK!");

   BufferedReader in2 = new BufferedReader(new InputStreamReader(conn2.getInputStream()));
   String inputLine2;
   StringBuffer response2 = new StringBuffer();

   while ((inputLine2 = in2.readLine()) != null) {
      response2.append(inputLine2);
   }

   in2.close();
   conn2.disconnect();

   JSONObject json2 = new JSONObject(response2.toString());
   System.out.println(json2.getString("status"));
Download the Files
This segment covers how to download your package into a zip file on your desktop, as well as the evidence summary. The first couple of lines remain the same. As a reminder, make sure to add /documents/zip to the request url.
if (json2.getString("status").equals("COMPLETED")){

   URL client3 = new URL(url + "/1edd9f11-9bcc-4587-94e8-aa6478bbda4d/documents/zip");
   HttpURLConnection conn3 = (HttpURLConnection) client3.openConnection();
   conn3.setRequestProperty("Content-Type", "application/json");
   conn3.setRequestProperty("Authorization", "Basic " + API_KEY);
   conn3.setRequestProperty("Accept", "application/zip");

   int responseCode3 = ((HttpURLConnection) conn3).getResponseCode();
   System.out.println(responseCode3 + " OK!");
   System.out.println("Downloading zip files....");
We then open the input stream from the HTTP connection. You can specify any location you wish on your computer. Do not forget to replace the placeholder text with your account name.
InputStream inputStream = conn3.getInputStream();
String saveFilePath = "C:/Users/your_account/Desktop/yourFiles.zip";
Next, open an output stream to write the zip file in the specified location. After all the data is written, go ahead and close the connection.
FileOutputStream outputStream = new FileOutputStream(saveFilePath);

int bytesRead = -1;
byte[] buffer = new byte[4096];
while ((bytesRead = inputStream.read(buffer)) != -1) {
   outputStream.write(buffer, 0, bytesRead);
}

System.out.println("Zip files downloaded!");
outputStream.close();
inputStream.close();
conn3.disconnect();
To download the evidence summary, the code is almost identical to downloading the zip file, with the exception of the Accept header field. Make sure to change that to application/pdf.
URL client4 = new URL(url + "/1edd9f11-9bcc-4587-94e8-aa6478bbda4d/evidence/summary");
HttpURLConnection conn4 = (HttpURLConnection) client4.openConnection();
conn4.setRequestProperty("Content-Type", "application/json");
conn4.setRequestProperty("Authorization", "Basic " + API_KEY);
conn4.setRequestProperty("Accept", "application/pdf");

int responseCode4 = ((HttpURLConnection) conn4).getResponseCode();
System.out.println(responseCode4 + " OK!");
System.out.println("Downloading evidence summary....");

inputStream = conn4.getInputStream();
saveFilePath = "C:/Users/your_account/Desktop/evidenceSummary.pdf";

outputStream = new FileOutputStream(saveFilePath);

bytesRead = -1;
buffer = new byte[4096];
while ((bytesRead = inputStream.read(buffer)) != -1) {
   outputStream.write(buffer, 0, bytesRead);
}

System.out.println("Evidence summary downloaded!");
outputStream.close();
inputStream.close();
conn4.disconnect();
Results
Press the run button in your IDE. If the package was already signed, the output should look like the following:
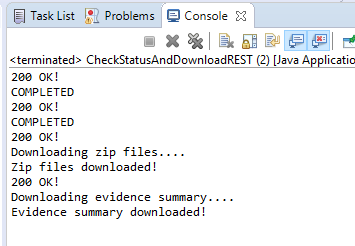
If you browse to the location you specified to save your zip file and evidence summary, you will find your files (if your package was completed):

To download the full code sample see our Code Share site.
This topic will walk you through the process to check the status of a transaction and to download any documents using the OneSpan Sign Java SDK.
This topic is a continuation of the steps completed in Creating and Sending a Package. At this point, you can confirm that your document package (transaction) was created and sent properly. To do this, simply check the OneSpan SignTransactions page.
Prerequisites
Before you can get started, you will need to set up your environment. This guide uses C# and Microsoft Visual Studio. Create a project (e.g. CheckStatusAndDownloadREST) and a .cs file (e.g. CheckStatusAndDownloadREST.cs). For more information see Creating and Sending a Package with the .NET SDK (you can ignore the .NET SDK portion and skip to the Downloading Microsoft Visual Studio and Create and Configure Your C# Project sections) for more detailed instructions.
Locating the Package ID of your Existing Project
Since the package you are working with was created previously, we need to find the package ID for use in this project. If you select the project from the UI inbox, as seen above, the URL will have the package ID, like this:
https://sandbox.esignlive.com/a/transaction/IW30CWirli6h6gZQqqfFXdrPSqA=
In the C# class you created in the last guide, you will see that the package ID was returned in the HTTP response you received from your REST call.
If you were creating a more complex application, you would likely store this package ID for use within other parts of your application, versus looking it up in your OneSpan Sign URLs.
The REST API
In this topic the following API functions will be called:
- A call to retrieve the whole package JSON, and obtain the package status.
- A call to obtain the Signing Status for the whole package, or a specific signer of specific document.
- A REST API call to download the zipped documents zip and evidence summary.
Retrieve Package JSON
HTTP Request
GET /api/packages/{packageId} HTTP Headers
Accept: application/json; esl-api-version=11.21 Authorization: Basic api_keyFor a complete description for each field in response, you can refer to last guidance.
And refer to Release Note 10.6.1 for reason carrying "esl-api-version" in the request header.
Retrieving Signing Status
HTTP Request
GET /api/packages/{packageId}/signingStatus?signer={signerId}&document={documentId} HTTP Headers
Accept: application/json Authorization: Basic api_keyResponse Payload
{
    "status": "COMPLETED"
}
- "signerId" in this API call can be replaced by signer's email.
Possible statuses are: ARCHIVED/ CANCELED/ COMPLETE/ DECLINED/ EXPIRED/ INACTIVE/ OPTED_OUT/ COMPLETED/ SIGNING_PENDING.
Download Zipped Documents
HTTP Request
GET /api/packages/{packageId}/documents/zip HTTP Headers
Accept: application/zip Authorization: Basic api_keyDownload Evidence Summary
HTTP Request
GET /api/packages/{packageId}/evidence/summary HTTP Headers
Accept: application/pdf Authorization: Basic api_keyThe Code
This segment of the guide will breakdown the code section by section. You can download the complete sample code from our Code Share site.
The first few lines are where the connection info for your OneSpan Sign connection is defined. If you are using a Production environment, use the url https://apps.esignlive.com/api. Make sure you replace the placeholder text with your API_KEY. You can find this value in the ACCOUNT page when signed into your OneSpan Sign account.
string apiKey = "YOUR_API_KEY";
string url = "https://sandbox.esignlive.com/api";
Next, you will create the HttpClient that you will use to make your GET requests and set the appropriate header authorization and accept values.
HttpClient myClient = new HttpClient();
myClient.DefaultRequestHeaders.Authorization = new AuthenticationHeaderValue("Basic", apiKey);
myClient.DefaultRequestHeaders.Add("Accept", "application/json,application/zip,text/html,application/xhtml+xml,application/xml;q=0.9,image/webp,*/*;q=0.8");
Check the Status
For this section, you will need the packageId that you found above. Using that, you can set up your GET request to see what the package status is. Possible values are ARCHIVED, COMPLETED, DECLINED, DRAFT, EXPIRED, OPTED_OUT, and SENT. The code below performs a GET request to the url created from the base url defined above with the remainder of the url from the appropriate REST call defined in the documentation (in this case, /packages/YOUR_PACKAGE_ID). The content of the response is then parsed into a JObject and the status property of the JObject is obtained and written to the Debug output.
var packageStatusResponse = myClient.GetAsync(new Uri(url + "/packages/YOUR_PACKAGE_ID")).Result;
JObject packageStatusResponseJSON = JObject.Parse(packageStatusResponse.Content.ReadAsStringAsync().Result);
var packageStatus = packageStatusResponseJSON["status"];
Debug.WriteLine("Package Status: " + packageStatus);
Next, check the signing status of the package. The possible values for this one are ARCHIVED, CANCELED, COMPLETE, DECLINED, EXPIRED, INACTIVE, OPTED_OUT, COMPLETED, and SIGNING_PENDING. This is done exactly the same as the last step except for an addition of /signingStatus to the request url. Write the response for this call to the Debug output window, as well.
var signingStatusResponse = myClient.GetAsync(new Uri(url + "/packages/0487df67-6417-48f8-9575-b520c0f977ff/signingStatus")).Result;
JObject signingStatusResponseJSON = JObject.Parse(signingStatusResponse.Content.ReadAsStringAsync().Result);
var signingStatus = signingStatusResponseJSON["status"].ToString();
Debug.WriteLine("Signing Status: " + signingStatus);
Download the Files
For the last part, you will check to see if the package is complete. If it is, the zip file of all documents will be downloaded, as well as the evidence summary. After each step, write to the Debug output so that you know the event happened when you test the class in the next step. Also, note the additions to the base url for each download.
if (signingStatus.Equals("COMPLETED"))
{
   var downloadZipResponse = myClient.GetAsync(new Uri(url + "/packages/0487df67-6417-48f8-9575-b520c0f977ff/documents/zip")).Result;
   ByteArrayContent content = new ByteArrayContent(downloadZipResponse.Content.ReadAsByteArrayAsync().Result);
   File.WriteAllBytes("C:/Eclipse/myzip.zip", content.ReadAsByteArrayAsync().Result);
   Debug.WriteLine("Zip File Downloaded");

   var evidenceSummaryResponse = myClient.GetAsync(new Uri(url + "/packages/0487df67-6417-48f8-9575-b520c0f977ff/evidence/summary")).Result;
   ByteArrayContent evidenceSummaryContent = new ByteArrayContent(evidenceSummaryResponse.Content.ReadAsByteArrayAsync().Result);
   File.WriteAllBytes("C:/Eclipse/myevidencesummary.pdf", evidenceSummaryContent.ReadAsByteArrayAsync().Result);
   Debug.WriteLine("Evidence Summary Downloaded");
}
else
{
   Debug.WriteLine("Signing not complete");
}
Results
Execute your C# class by clicking the Start button from the toolbar.
If you have not yet signed your package, your Output should look like the following:
After signing your package, you will get the following in your Output window:
If you now browse to the location where you saved your files, you will see that your files were successfully downloaded.
To download the full code sample see our Code Share site.
This topic will walk you through the process to check the status of a transaction and to download any documents using the OneSpan Sign APEX SDK.
This topic is a continuation of the steps completed in Creating and Sending a Package. At this point, you can confirm that your document package (transaction) was created and sent properly. To do this, simply check the OneSpan SignTransactions page.
Prerequisites
To continue you need to add an Apex class named OssCheckStatusAndDownload with a function checkStatusAndDownload(). If you need help with this setup, see Creating and Sending a Package.
Locating the Package ID
Since the package you are working with has already been created, you will need to find it to use in this project. If you select the project from the Transaction page, as shown above, the URL will have the package ID, like this:
https://sandbox.esignlive.com/a/transaction/{packageId}
In the Apex class you created before, you will see you had access to this package ID while creating and sending it. If you were creating a more complex application, you would likely store this package ID for use within other parts of your application, versus looking it up in your OneSpan Sign URLs.
In our example, in order to print out the package ID, you can add this code to the function:
System.debug('PackageId: ' + packageId);
After the line:
String packageId = sdk.createPackage(pkg);
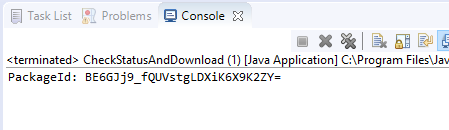
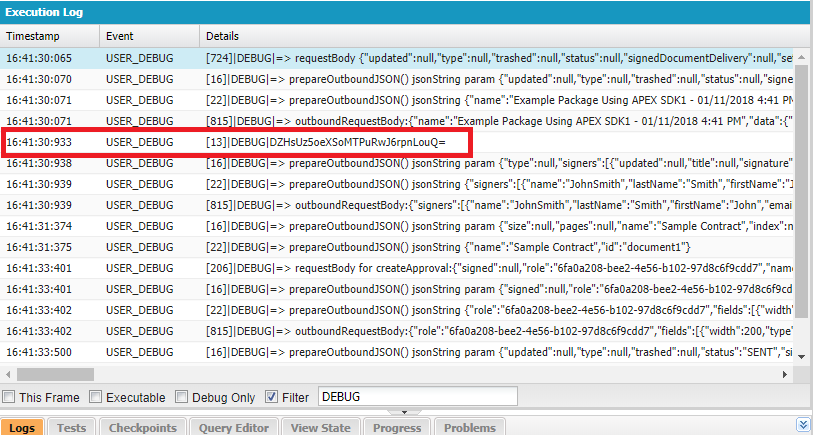
After you run this Apex class, you will see the package ID printed in the debug console:
The Code
In this segment, the code will be explained section by section. You can get the complete sample code from our Code Share site.
Connection Information
Before you create an ESL client and connected it to OneSpan Sign, you must do the following:
- Create a Custom Setting where your Api Key and Endpoint are assigned.
- Add your instance endpoint to your Remote Site Settings.
For information on how to complete these steps, see Creating and Sending a Package.
As this is a very simple example, the code is written in a static function within the same eslController Apex class. The first line inside the method creates an ESL client where the SDK will read the connection information using the settings defined in the previous steps.
//connect to OneSpan Sign
ESignLiveSDK sdk= new ESignLiveSDK();
Then, you will use your PackageId obtained from the OneSpan Sign Inbox or from the Debug Console as an input parameter to grab your previously sent package from the OneSpan Sign client.
//create a packageId using you packageId string
String packageId = '2APPpsAcqVk8QbJKABFqWvHy-kQ=';
//get your package
ESignLiveAPIObjects.Package_x pack = sdk.getPackage(packageId);
Check the Status
Now that you have access to the document package, you can check your package to see what the package status is. The possible values are ARCHIVED, COMPLETED, DECLINED, DRAFT, EXPIRED, OPTED_OUT, and SENT. Print the status so you can see it in the console when you execute your class.
//retrieve package status
ESignLiveAPIObjects.PackageStatus packageStatus = pack.status;
System.debug('Package Status: '+packageStatus);
Next, check the signing status of the package. The possible values for this one are ARCHIVED, CANCELED, COMPLETE, DECLINED, EXPIRED, INACTIVE, OPTED_OUT, COMPLETED, and SIGNING_PENDING. Print this status to the console, as well.
//retrieve signing status
String signingStatus = sdk.getSigningStatus(packageId);
System.debug('Signing Status: '+signingStatus);
Download the Files
For the last part, you will check to see if the package is complete. If it is, all documents will be downloaded, as well as the evidence summary. We will first read all files in blob type, and then insert them into a document folder named onespan.
if(packageStatus == ESignLiveAPIObjects.PackageStatus.COMPLETED &&
   signingStatus .equals('COMPLETED')
){
System.debug('Transaction is completed and ready to download!');

//download all documents
List docs = new List();
Folder folder = [select id from Folder where name='onespan' LIMIT 1];

for(ESignLiveAPIObjects.Document document: pack.documents){
    Blob response = sdk.downloadDocument(packageId, document.id);

    Document doc = new Document();
    doc.Body = response;
    doc.FolderId = folder.id;
    doc.Name = pack.name + ' - ' + document.name;
    doc.Type = 'pdf';
    docs.add(doc);
}

//download evidence summary
String auditString= sdk.getAudit(packageId);
Document auditDoc= new Document();
auditDoc.Body = EncodingUtil.base64Decode(auditString);
auditDoc.FolderId = folder.id;
auditDoc.Name = pack.name + ' - evidence summary';
auditDoc.Type = 'pdf';

for(Document doc: docs){
    insert doc;
}
insert auditDoc;

}else{
    System.debug('Transaction is not ready to download!');
}
Results
You can now execute your Apex class. Open up your Developer Console and press Ctrl + E to launch the Execute Anonymous Window. Type in:
new OssCheckStatusAndDownload.checkStatusAndDownload();
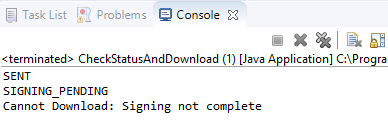
If you have not yet signed your package, your Console should look like the following:
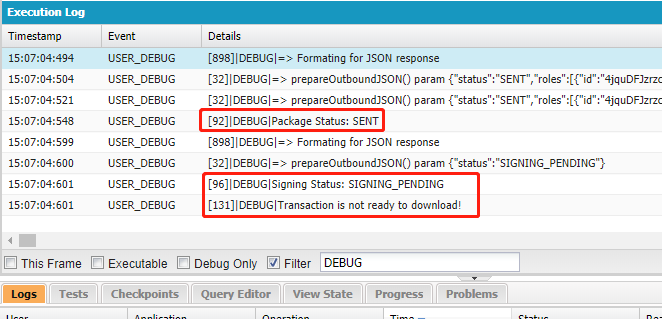
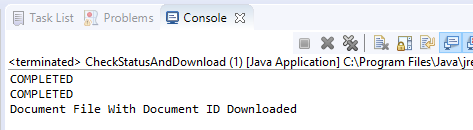
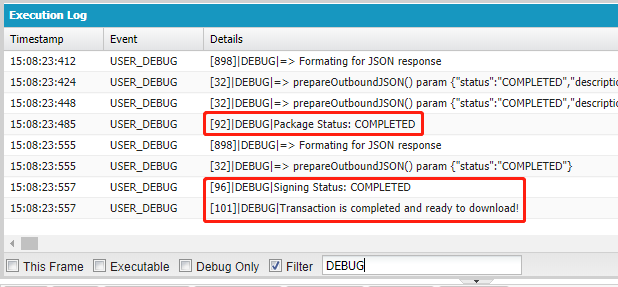
After signing your package, you will get the following output in your Console view:
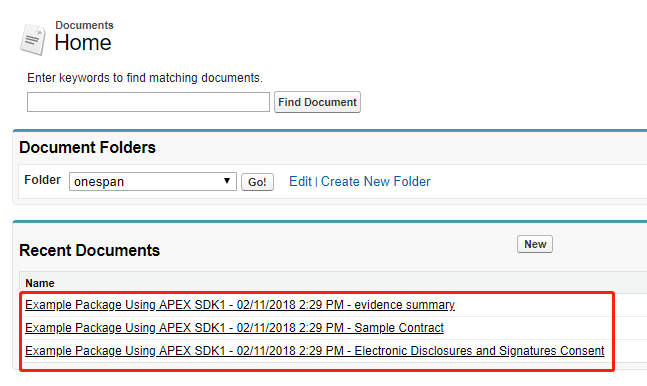
If you go to your onespan document folder and you will see that your files were successfully downloaded.