Adding Signers
A signer is a person who has been designated to sign one or more documents in a package. A package's signers are displayed in its Signers list. By default, the package owner is listed as a signer. Other signers can be added one at a time.
The rest of this section describes the following topics, which are relevant to managing signers:
Adding Signers
You must save a package before you can add a signer to it.
To add a signer to a package:
- Click Information > Signers.
- From the ribbon, click Add New. The New OneSpan Sign Signer page appears.
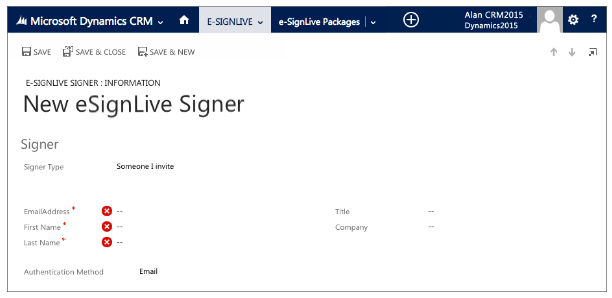
- From Signer Type, select one of the following three options:
- Someone I invite: To invite someone to sign, enter the signer's Email Address, First Name, Last Name, and optionally, their Title and Company.
-
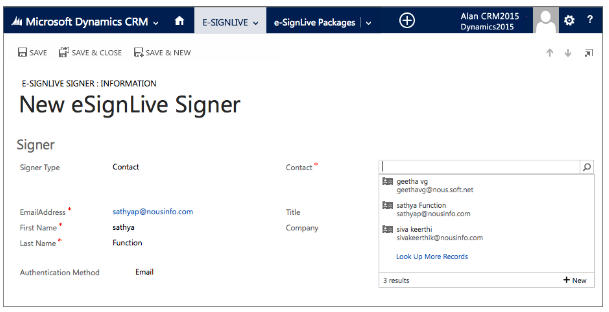
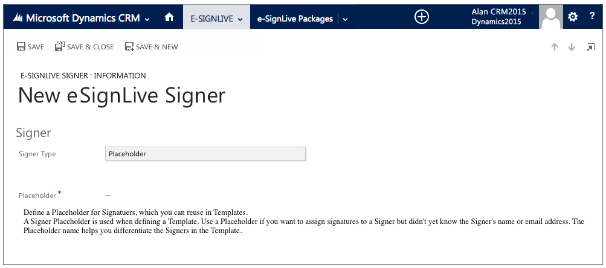
Contact: To add an existing Dynamics CRM contact as a signer, choose Contact, and select that person from the list of contacts. - Placeholder: Choose this option if you want to add a placeholder for a signer. This is useful if you are creating a template, and don't know the signer's identity.
- Email: This is the default method. The signer's identity is verified by their ability to access the invitation email sent by OneSpan Sign. Because this method depends on the security of the email system, the Q&A and SMS methods are more secure.
- Q&A: This method requires the package owner to specify one or two questions and answers. If a signer correctly answers the questions, they are verified as the intended package recipient. You can choose to mask the answer entered by the signer, so each character they enter will appear on their screen as an asterisk (*).
- SMS: This method requires the package owner to provide the signer's mobile phone number. Once the package is sent, OneSpan Sign will send a code to this number. The signer's identity is verified by their ability to provide that code when they try to access the package.
- Personal Email Message Option
- Document Delivery Option
- Change Signer Option
Changing the Signer Order
If a package has multiple documents, each signer must sign the documents in the order in which they appear in the package's Documents list.
By default, signers can sign in any order. If the order in which signers sign is important, a Signer Workflow can be defined.
To define a Signer Workflow:
- From the Dynamics CRM menu, click the down arrow next to your package, and click Signers.
- Select the box next to a signer whose position in the Signers list you want to change. In the dynamic menu under Signers Associated View, click Move Up or Move Down until the signer is in the desired position.
- Repeat Step 2 for other signers until all signers are in the desired order.

Deleting Signers
To delete a signer from a package:
- Select the box next to the signer you want to delete.
- From the ribbon, click Delete.
Adding Signers
A signer is a person who has been designated to sign one or more documents in a package. A package's signers are displayed in its Signers list. By default, the package owner is listed as a signer. Other signers can be added one at a time.
The rest of this section describes the following topics, which are relevant to managing signers:
Adding Signers
You must save a package before you can add a signer to it.
To add a signer to a package:
- From the Signers section of your package, click the plus sign +. The New OneSpan Sign Signer page appears.
- From Signer Type, select one of the following three options:
- Someone I invite: To invite someone to sign, enter the signer's Email Address, First Name, Last Name, and optionally, their Title and Company.
Contact: To add an existing Dynamics CRM contact as a signer, choose Contact, and select that person from the list of contacts. - Placeholder: Choose this option if you want to add a placeholder for a signer. This is useful if you are creating a template, and don't know the signer's identity.
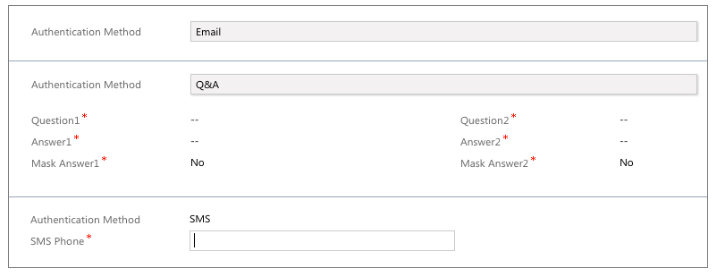
- Choose one of the following ways of authenticating the signer.
- Email: This is the default method. The signer's identity is verified by their ability to access the invitation email sent by OneSpan Sign. Because this method depends on the security of the email system, the Q&A and SMS methods are more secure.
- Q&A: This method requires the package owner to specify one or two questions and answers. If a signer correctly answers the questions, they are verified as the intended package recipient. You can choose to mask the answer entered by the signer, so each character they enter will appear on their screen as an asterisk (*).
- SMS: This method requires the package owner to provide the signer's mobile phone number. Once the package is sent, OneSpan Sign will send a code to this number. The signer's identity is verified by their ability to provide that code when they try to access the package.
- Optional: Click Advanced if you want to use any of the following options:
- Personal Email Message Option
- Document Delivery Option
- Change Signer Option
- From the ribbon, click Save . The signer is added to the package.
Changing the Signer Order
If a package has multiple documents, each signer must sign the documents in the order in which they appear in the package's Documents list.
By default, signers can sign in any order. If the order in which signers sign is important, a Signer Workflow can be defined.
To define a Signer Workflow:
- From the Dynamics CRM menu, click the down arrow next to your package, and click Signers.
- Select the box next to a signer whose position in the Signers list you want to change. In the dynamic menu under Signers Associated View, click Move Up or Move Down until the signer is in the desired position.
- Repeat Step 2 for other signers until all signers are in the desired order.
Deleting Signers
To delete a signer from a package:
- Select the box next to the signer you want to delete.
- From the ribbon, click Delete.
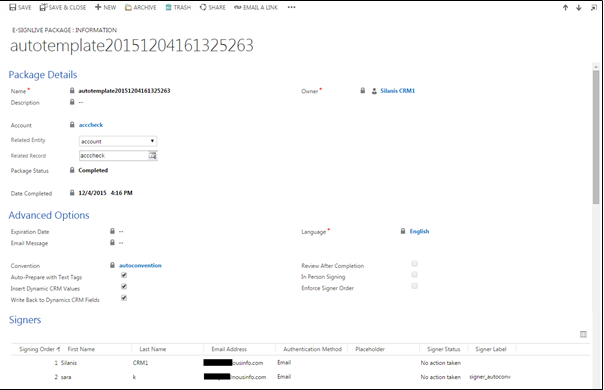
A OneSpan Sign document package is a container for related documents that need to be signed. In general, such packages contain one or more documents (up to ten) and one or more signers. The sender of a package generally performs the following procedures:
A signer is a person who has been designated to sign one or more documents in a package. A package's signers are displayed in its Signers list. By default, the package owner is listed as a signer. Other signers can be added one at a time.
The rest of this section describes the following topics, which are relevant to managing signers:
- Adding a Signer
- Changing the Signer Order
- Deleting a Signer
- Viewing the Status of a Package's Signers
Adding a Signer
To add a signer to a package:
- Ensure that the package has been saved.
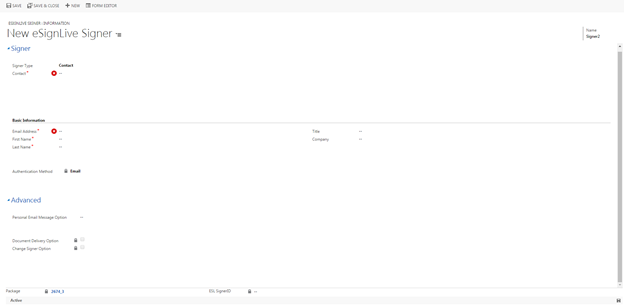
- From the Signers section of the package, click "+". The New OneSpan Sign Signer page appears.
- From Signer Type, select one of the following:
- Someone I invite: If you choose this option, enter the Email, First Name, and Last Name of the intended signer. Optionally, enter the signer's Title and Company.
- Contact: If you choose this option, click the magnifying-glass icon on the right to view a list of OneSpan Sign for Microsoft Dynamics CRM contacts. Then select one of those contacts.
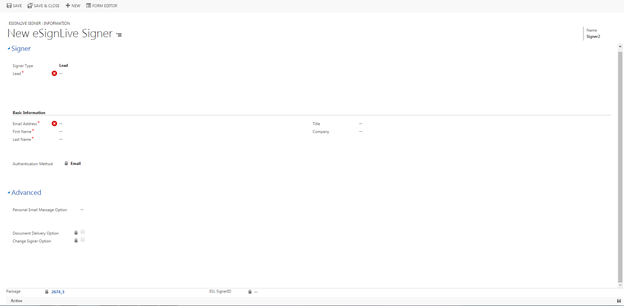
- Lead: If you choose this option, click the magnifying-glass icon on the right to view a list of OneSpan Sign for Microsoft Dynamics CRM leads. Then select one of those leads.
- User: If you choose this option, click the magnifying-glass icon on the right to view a list of OneSpan Sign for Microsoft Dynamics CRM users. Then select one of those users.
- Placeholder: Choose this option if you want to add a placeholder for a signer. This is useful if you are creating a template, and don't know the identity of the signer.

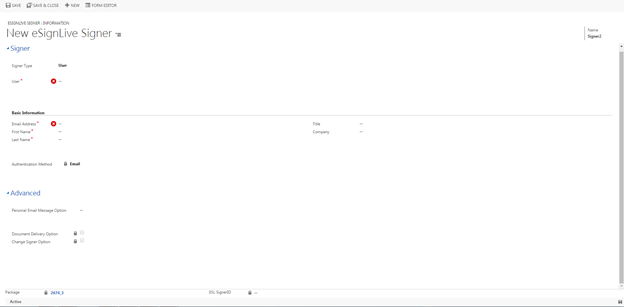
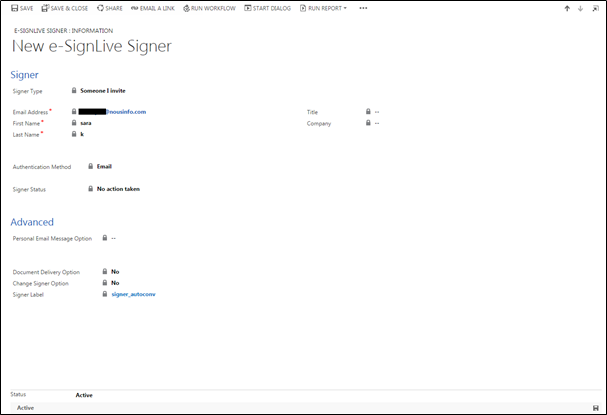
- Choose one of the following ways of authenticating the signer.
- Email (default): The signer is authenticated by their ability to access the email message sent by OneSpan Sign.
- Q&A: The signer is authenticated by their ability to answer questions specified by the package owner. You can choose to mask the signer's answers on their screen (if masked, each typed character will appear as an asterisk).
- SMS: An SMS message is sent to the signer’s cell phone. To continue the e-signature process, the signer must enter the PIN provided in the SMS message.
The reliability of the Email method depends on the security of the email system. The Q&A and SMS methods provide enhanced security.
- Click Advanced if you want to use any of the following options:
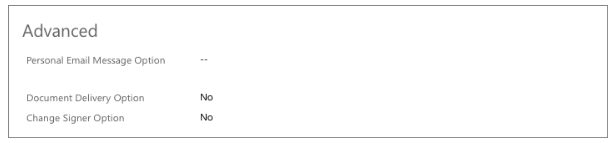
- Personal Email Message Option — Use this option to create a personal email message to be sent to the above signer. If you wish, a unique personal message can be sent to each signer in the package. Personal email messages override the package email message.
- Document Delivery Option — Select Yes if you want OneSpan Sign to deliver signed documents as an email attachment. With this delivery option, the package can be downloaded manually by all signers until the package owner archives or deletes it.
- Change Signer Option — Select Yes if you want to enable the signer to delegate another person to sign in their place. The original signer will be asked to enter the email address and full name of their delegate, along with an optional email message for the delegate. You will be notified when the signer is changed.
- Click Save & Close.
Changing the Signer Order
If a package contains multiple documents, each signer must sign them in the order in which they appear in the package's Documents list.
By contrast, the default condition is that a package' signers can sign in any order.
The following procedure describes how to specify the order in which signers must sign.
To specify the order in which signers must sign a package:
- Select the Enforce Signer Order option in the Advanced Options section of the package's Package page.
- In the Signers section, click the top right icon (
 ).
). - Select a signer whose position in the signing order you want to change .
- From the ribbon, click Move Up or Move Down until the signer is in the desired place among all signers.
- Repeat the previous two steps for each signer whose position in the signing order you want to change.
Deleting a Signer
To delete a signer from a package:
- In the Signers section of the package, click the option box next to the signer.
- From the ribbon, click Trash.
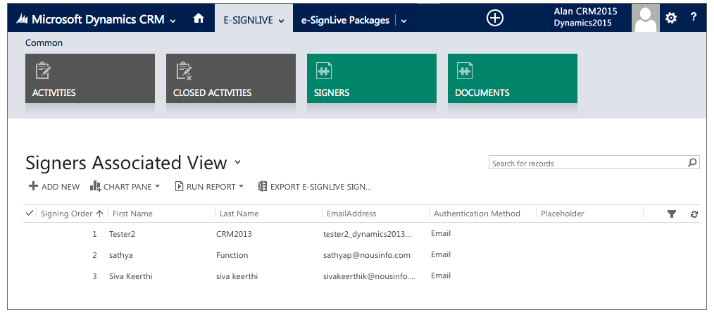
Viewing the Status of a Package's Signers
To view the status of a package's signers:
- Navigate to the All OneSpan Sign Packages page. A list of all your packages appears. The Signer Status column for a given package displays an expression of the form "M of N", where M is the number of signers who have finished signing, and N is the total number of signers.
- In the row of the relevant package, hover your mouse over the Signer Status column.
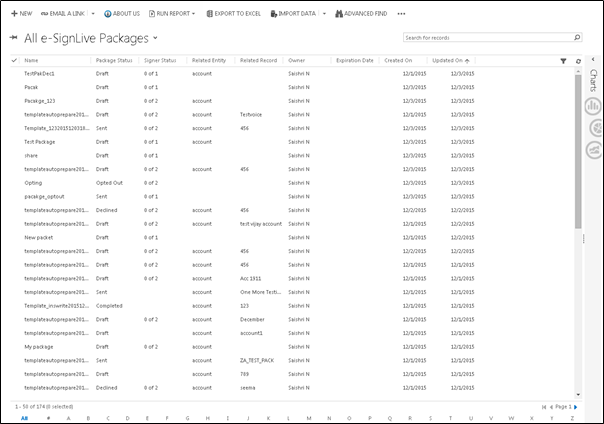
A popup window displays the status of all reviewers and signers. Here are the possible statuses:
- Declined: The person declined to sign the package.
- Opted out: The person opted out of signing the package electronically.
- Completed: The person reviewed/signed all documents assigned to them.
- No action taken: The person has not taken any action on the package.
- Signature not required: The person is a reviewer. Reviewers are not required to sign documents.
If the Package Status was Completed or Archived in a previous version of OneSpan Sign for Microsoft Dynamics CRM, the Signer Status will say "Unavailable."